 Nerve Blocks App
 Pain Medicine Assistant App
 POCUS App
 IV Access App
 MSK Knee App
 VetRA App
 Nerve Block Manual
 Regional Anesthesia Updates
 Anesthesiology Manual
 Anesthesiology Review
 Anesthesia Updates 2025
 Anesthesia Updates 2026
 Pediatric Anesthesia Updates
 Airway Management Updates
 US Interventional Pain Manual
 Pain Medicine Updates
 Mastering Difficult IV Access
 PACU Nursing Manual
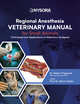 RA Veterinary Manual
 About
About
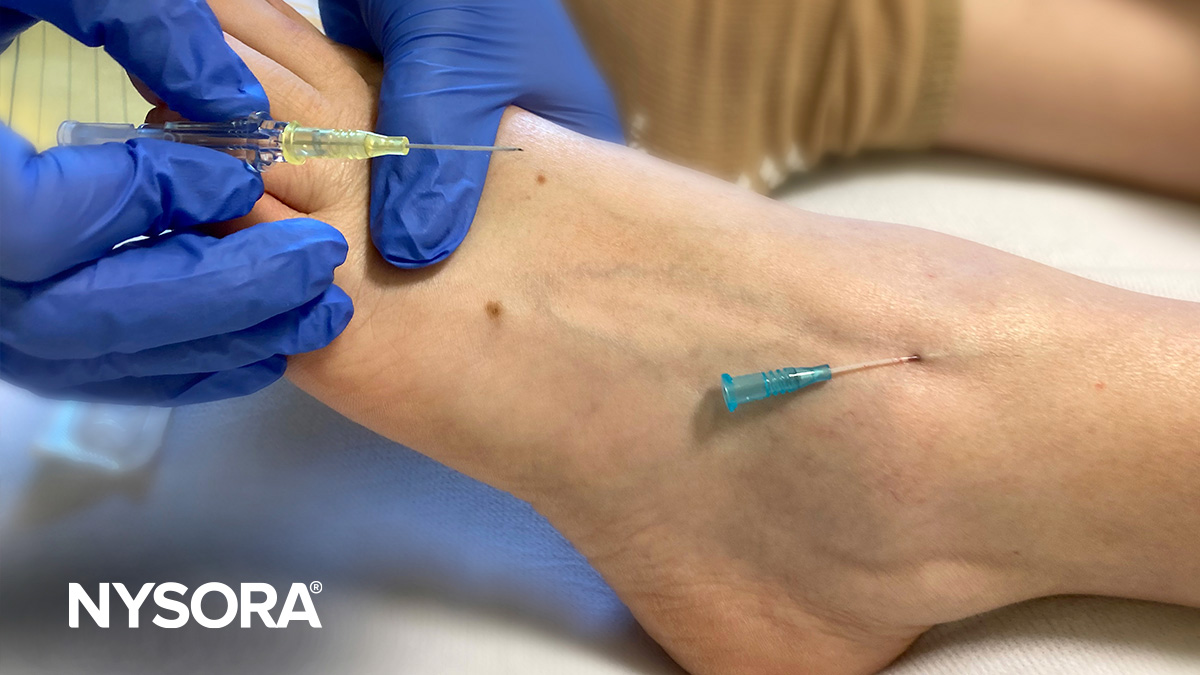
Difficult or invisible superficial veins
Navigating the challenge of difficult or invisible superficial veins is a critical skill for IV cannulation. This chapter discusses the complexities of identifying and accessing veins that are not readily visible or palpable, a common obstacle in patients with varying anatomical and physiological characteristics. Age, hydration status, and certain medical conditions can render veins less apparent, complicating IV procedures.

Applying warm towels or compresses helps vasodilate the veins in patients with cold hands. Note that the semi-sitting position helps gravity fill the veins.

Soaking the patient’s hand in warm water helps with vasodilation and increases the size of the veins.
Here are some tips to increase the likelihood of successful outcomes.
- Hydration: Adequate hydration can enhance venous volume. If possible, let the patient drink water or sports drinks.
- Heat application: A warm compress, heating, or warm towels cause vasodilation, increasing the size and visibility of the veins. Similarly, submerging the extremity in a warm bath can be useful for identifying veins.
VIDEO: https://youtu.be/GzlutuxDLLc
- Patient position: Where applicable, have the patient perform an exercise that activates the muscle pump and helps fill the vein with more blood. For example, if starting an IV at the wrist, have the patient clench and unclench their fist to increase vein prominence.
VIDEO: https://youtu.be/4f-su1UHKwY
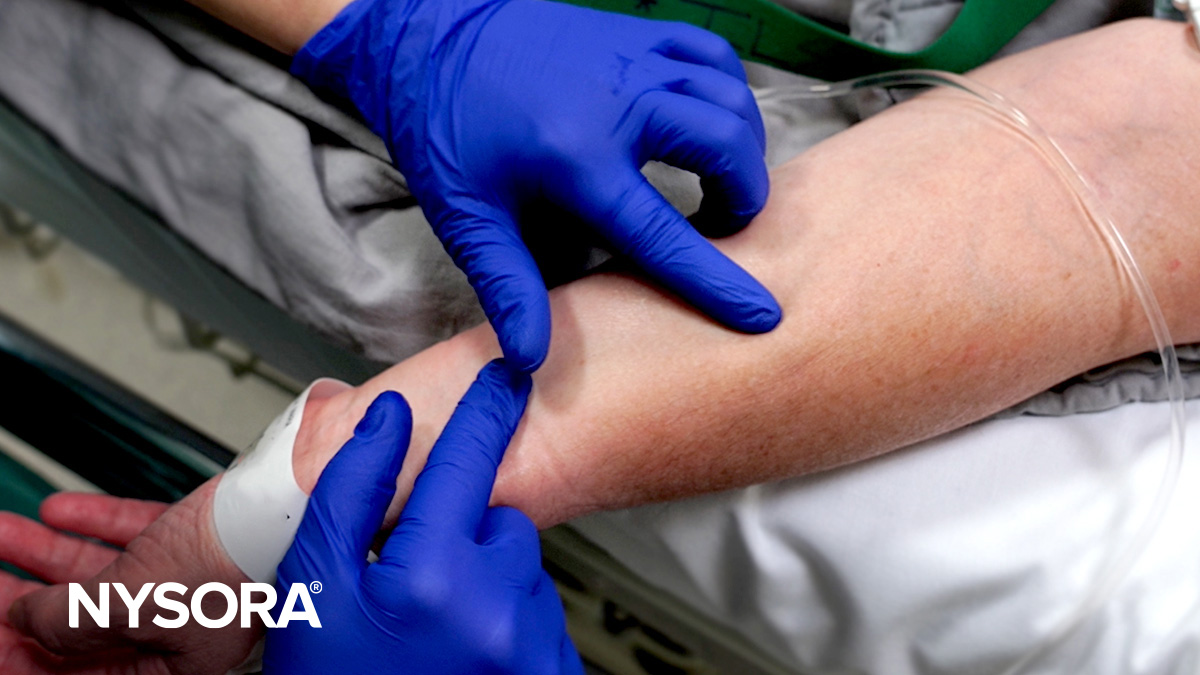
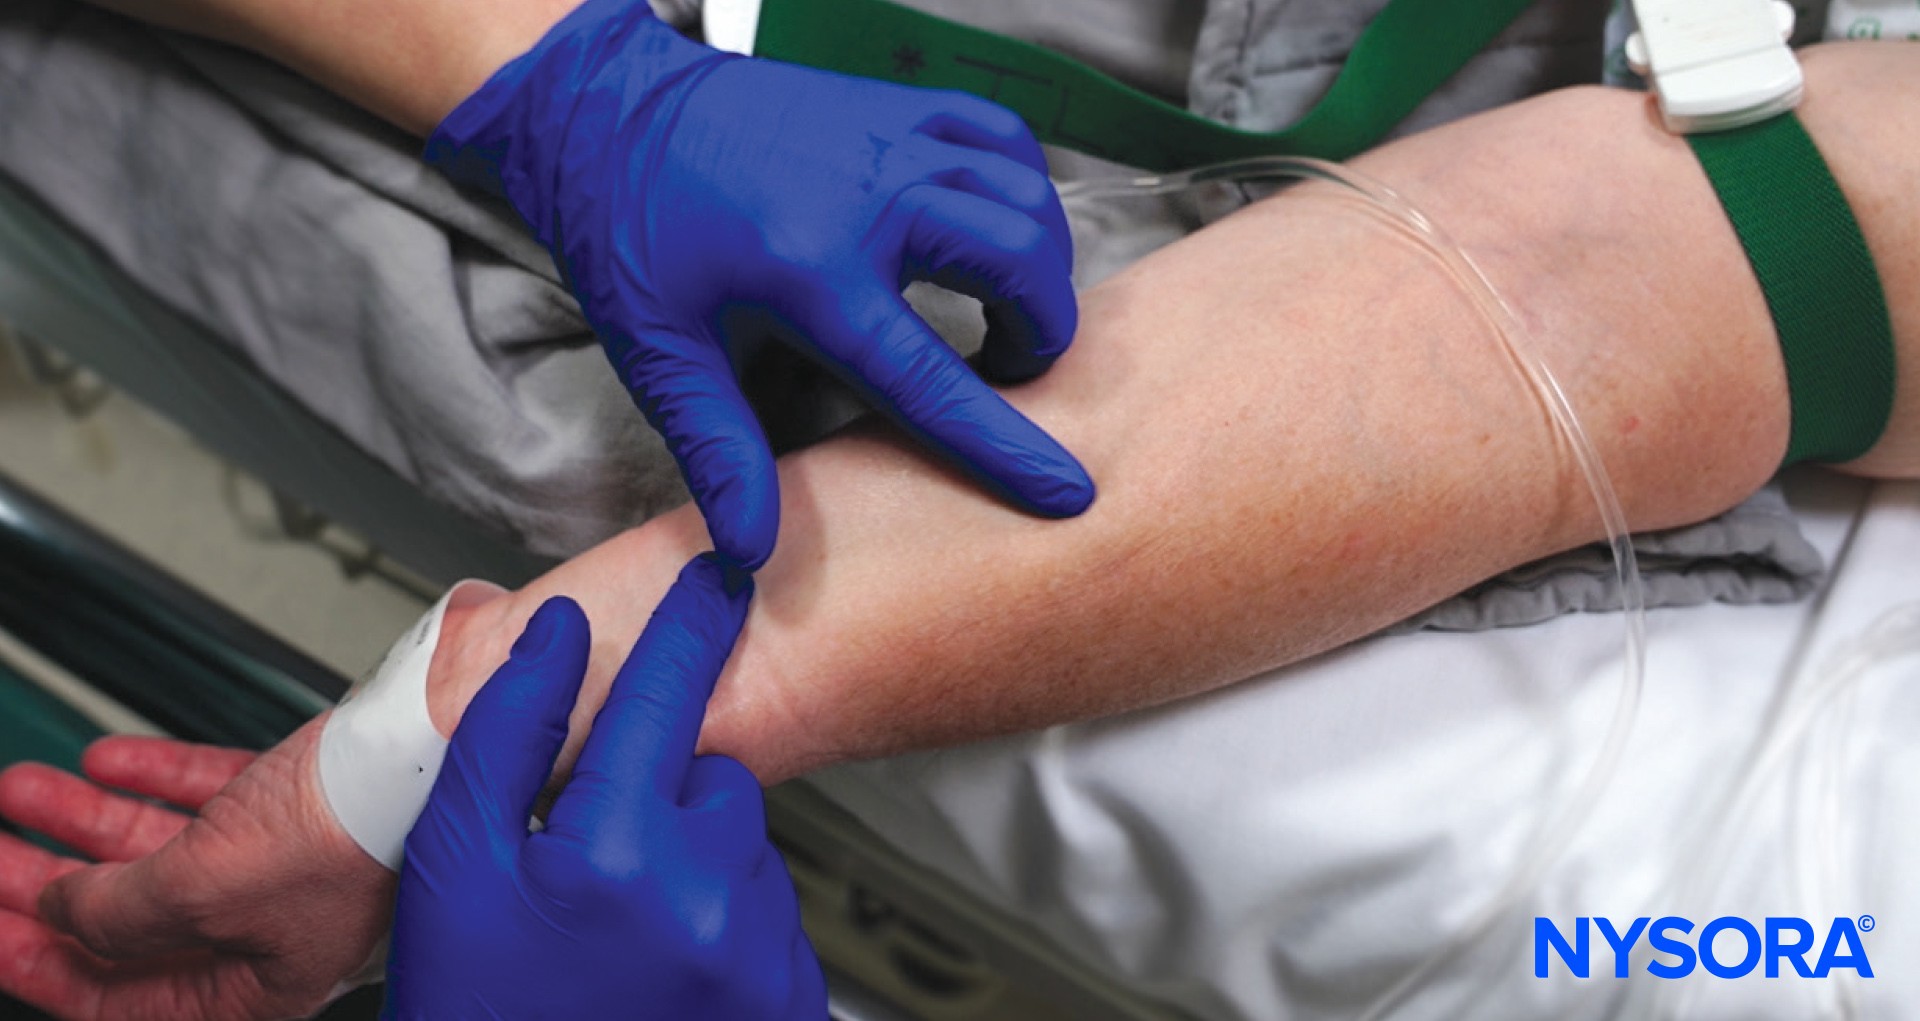
- Tapping on skin: Lightly tap the skin to induce mild venous vasodilation, increasing vein visibility.
VIDEO: https://youtu.be/KvFbhswDy9k
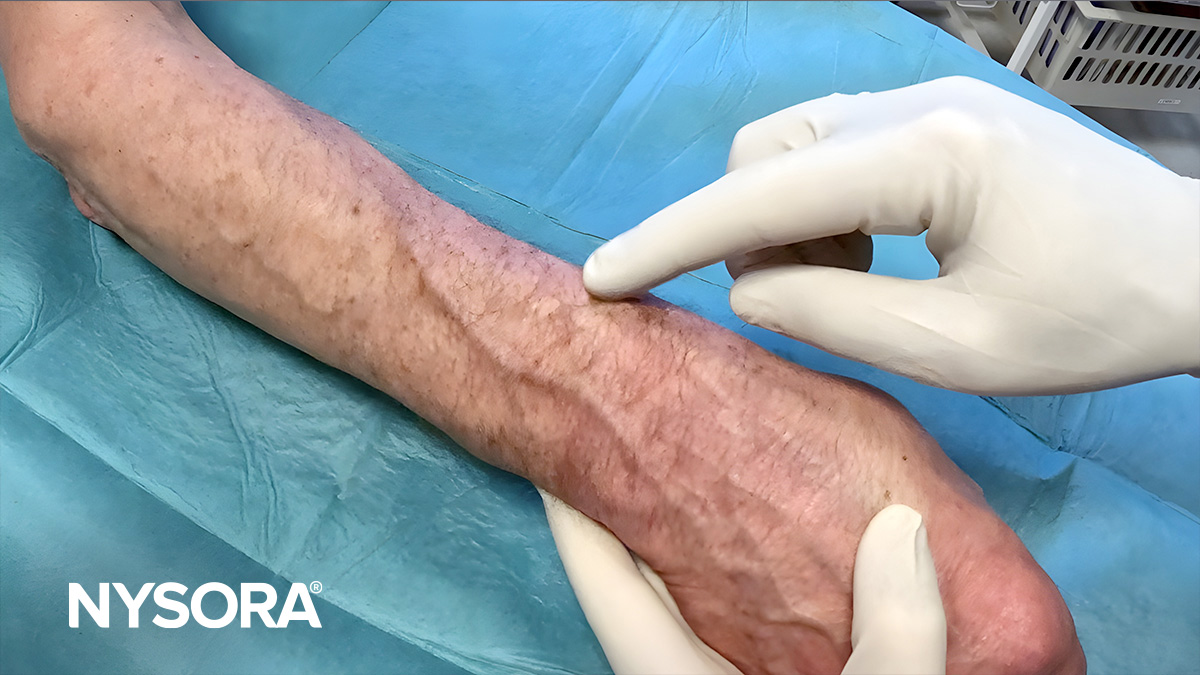
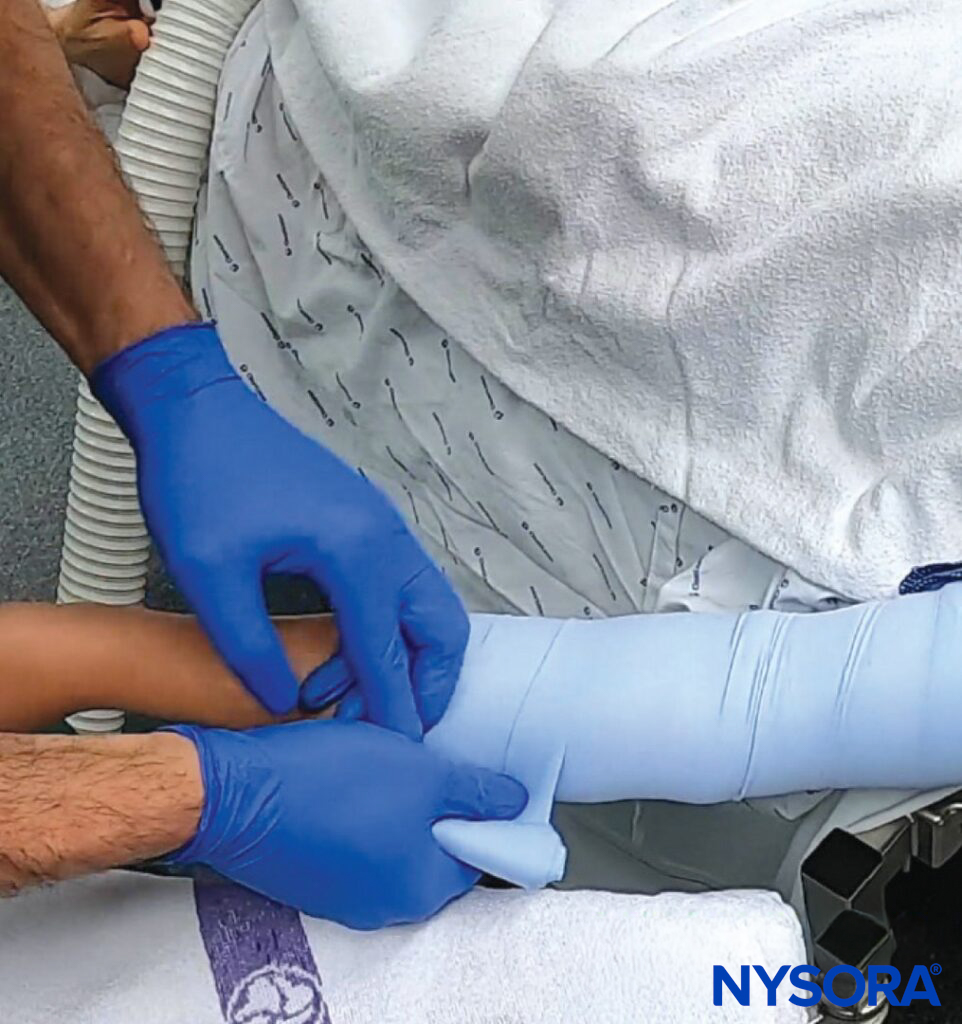
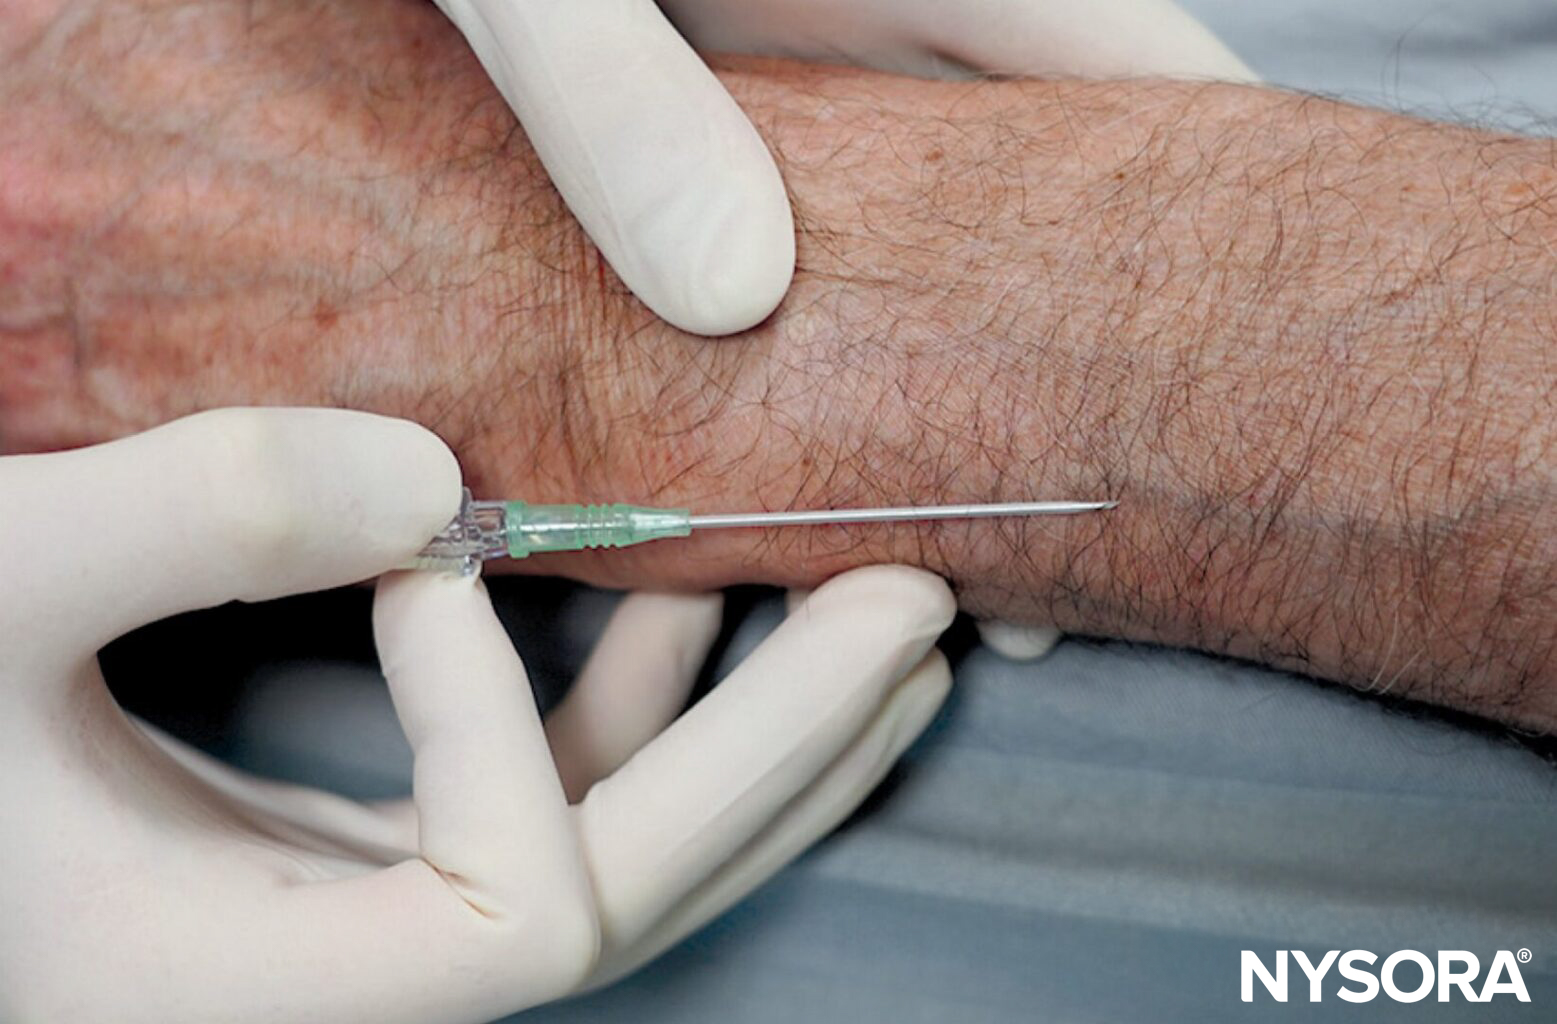
- Stabilize the vein: Pull and stretch the skin distally to stabilize the vein during puncture. However, be careful not to apply too much pressure on the skin over the vein, as this can have the opposite effect and empty the vein, making the vein more difficult to cannulate.
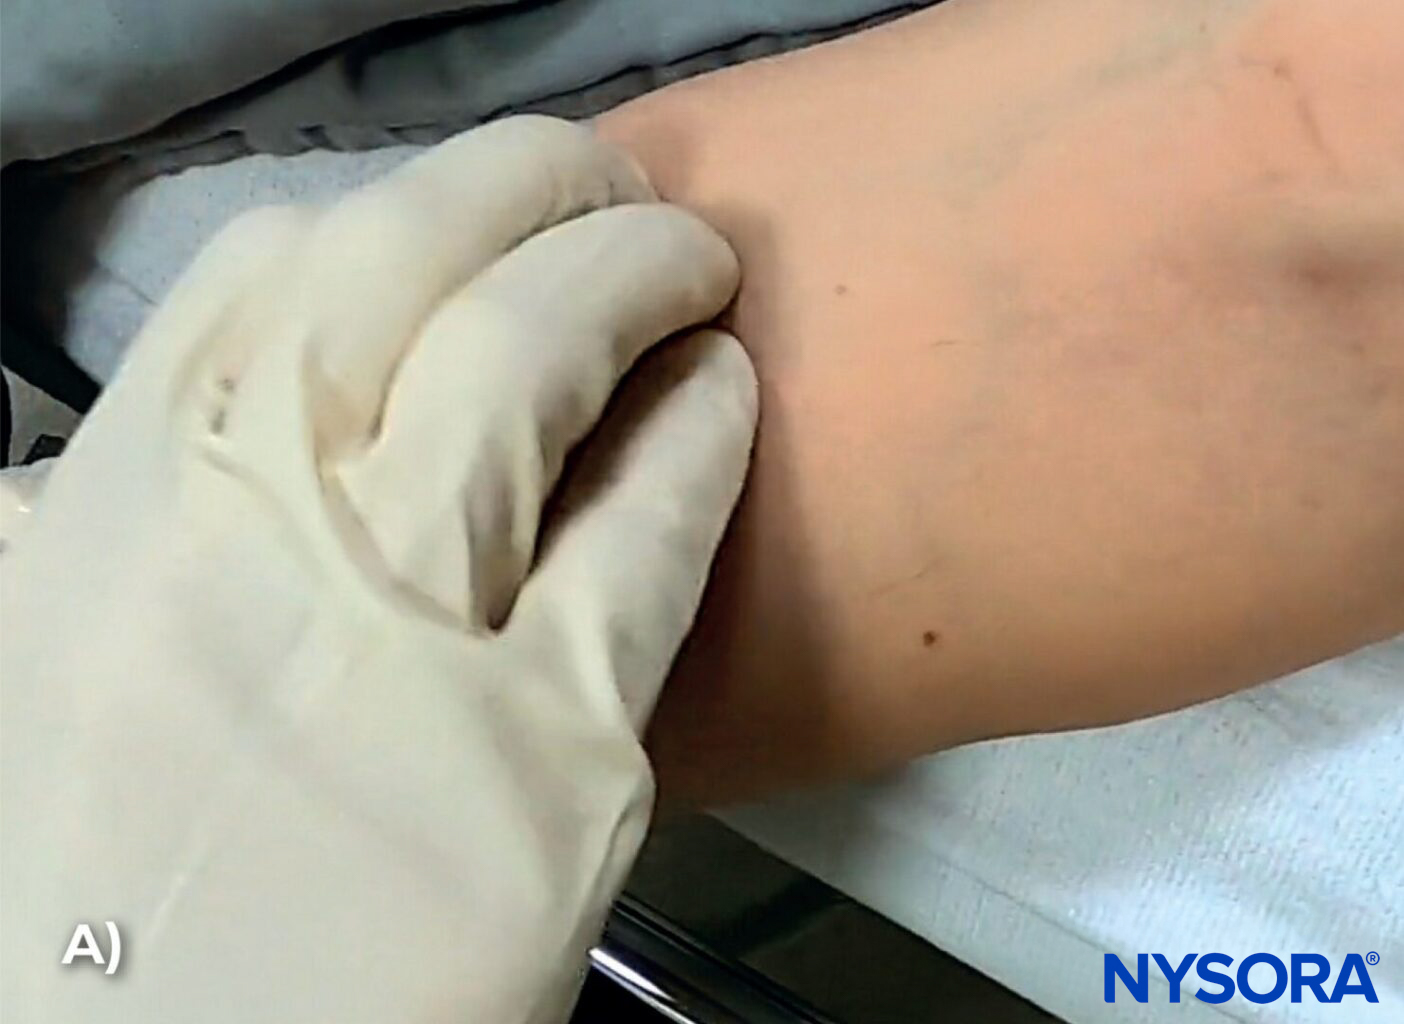
A) Lightly tap the skin to induce mild venous vasodilation, increasing vein visibility. B) Stabilize the vein during venipuncture using digital traction. Here, the left thumb is used to pull the skin and stabilize the vein to prevent rolling.
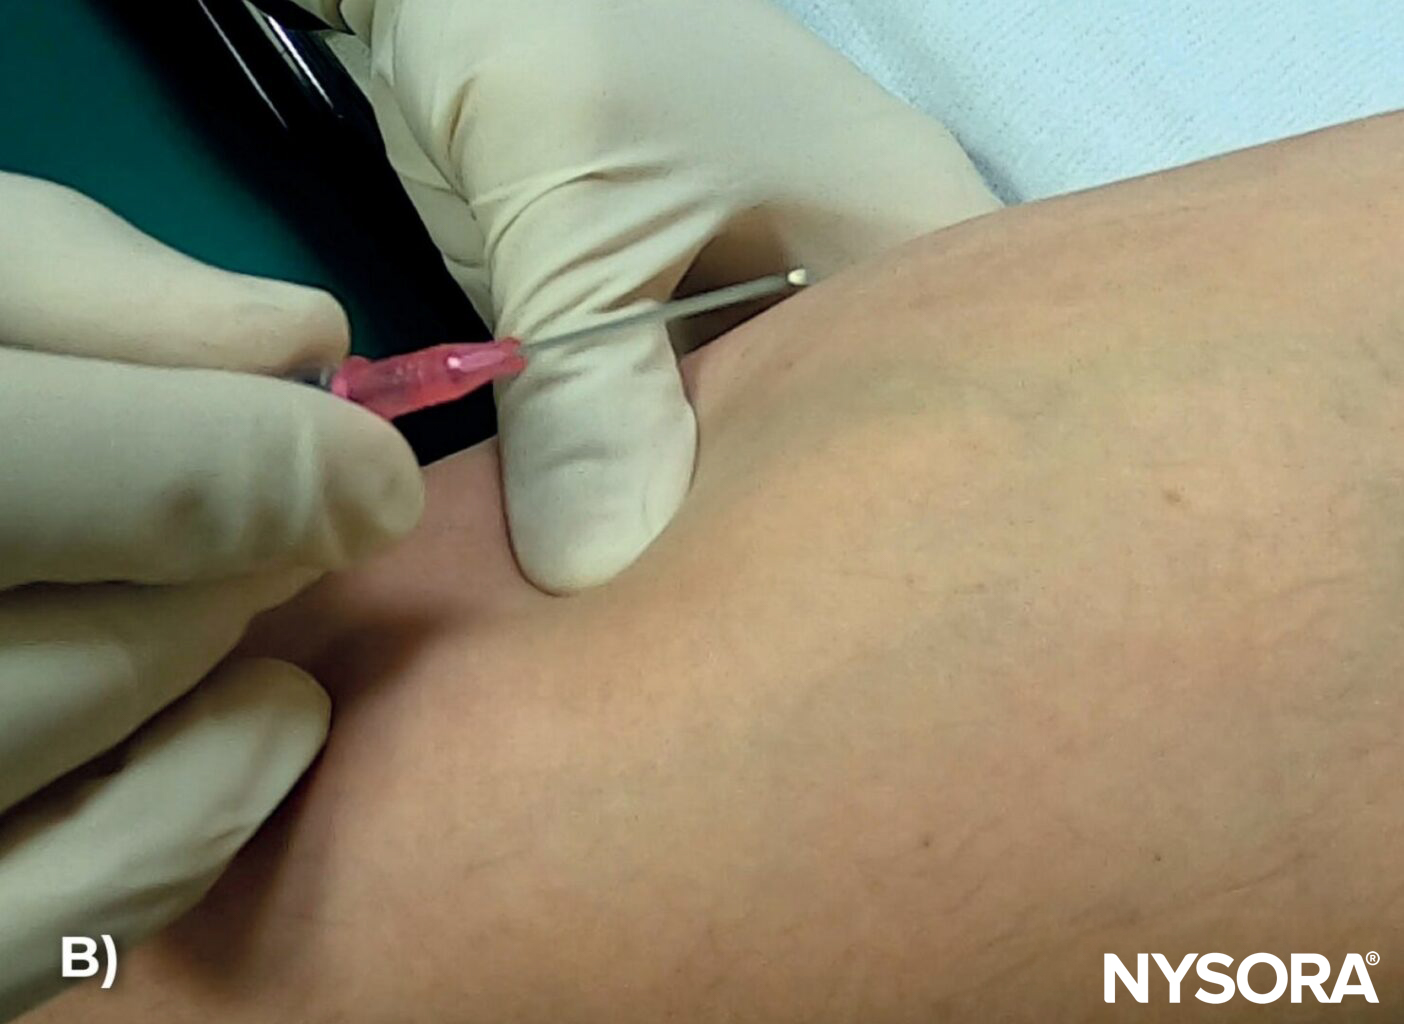
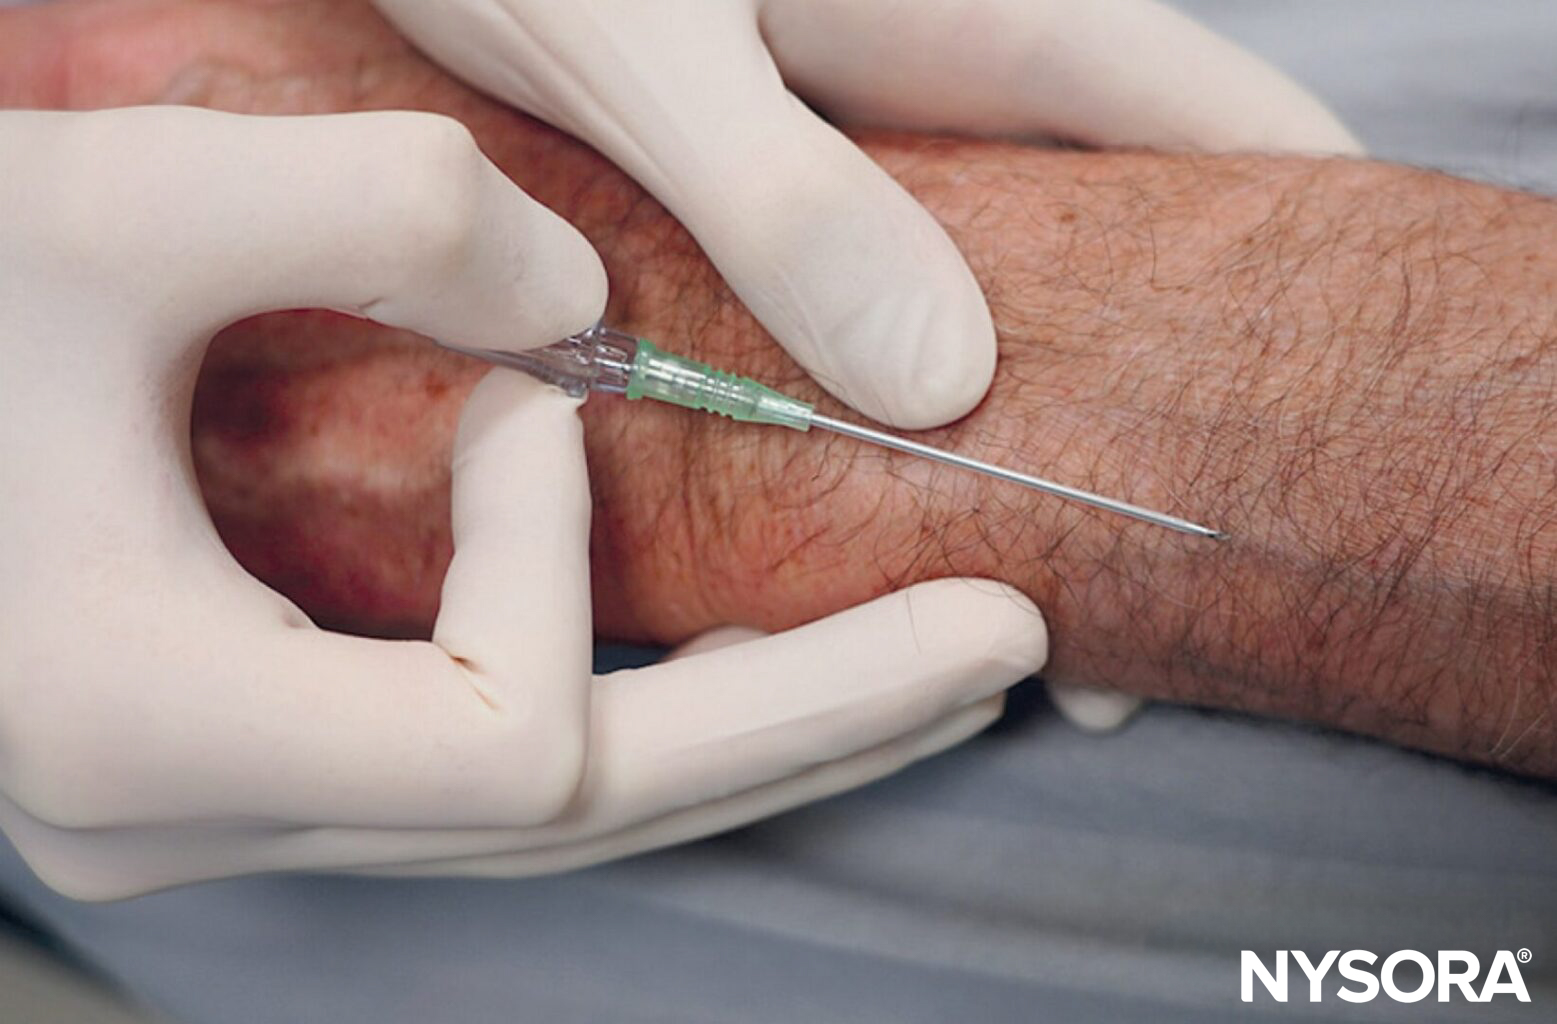
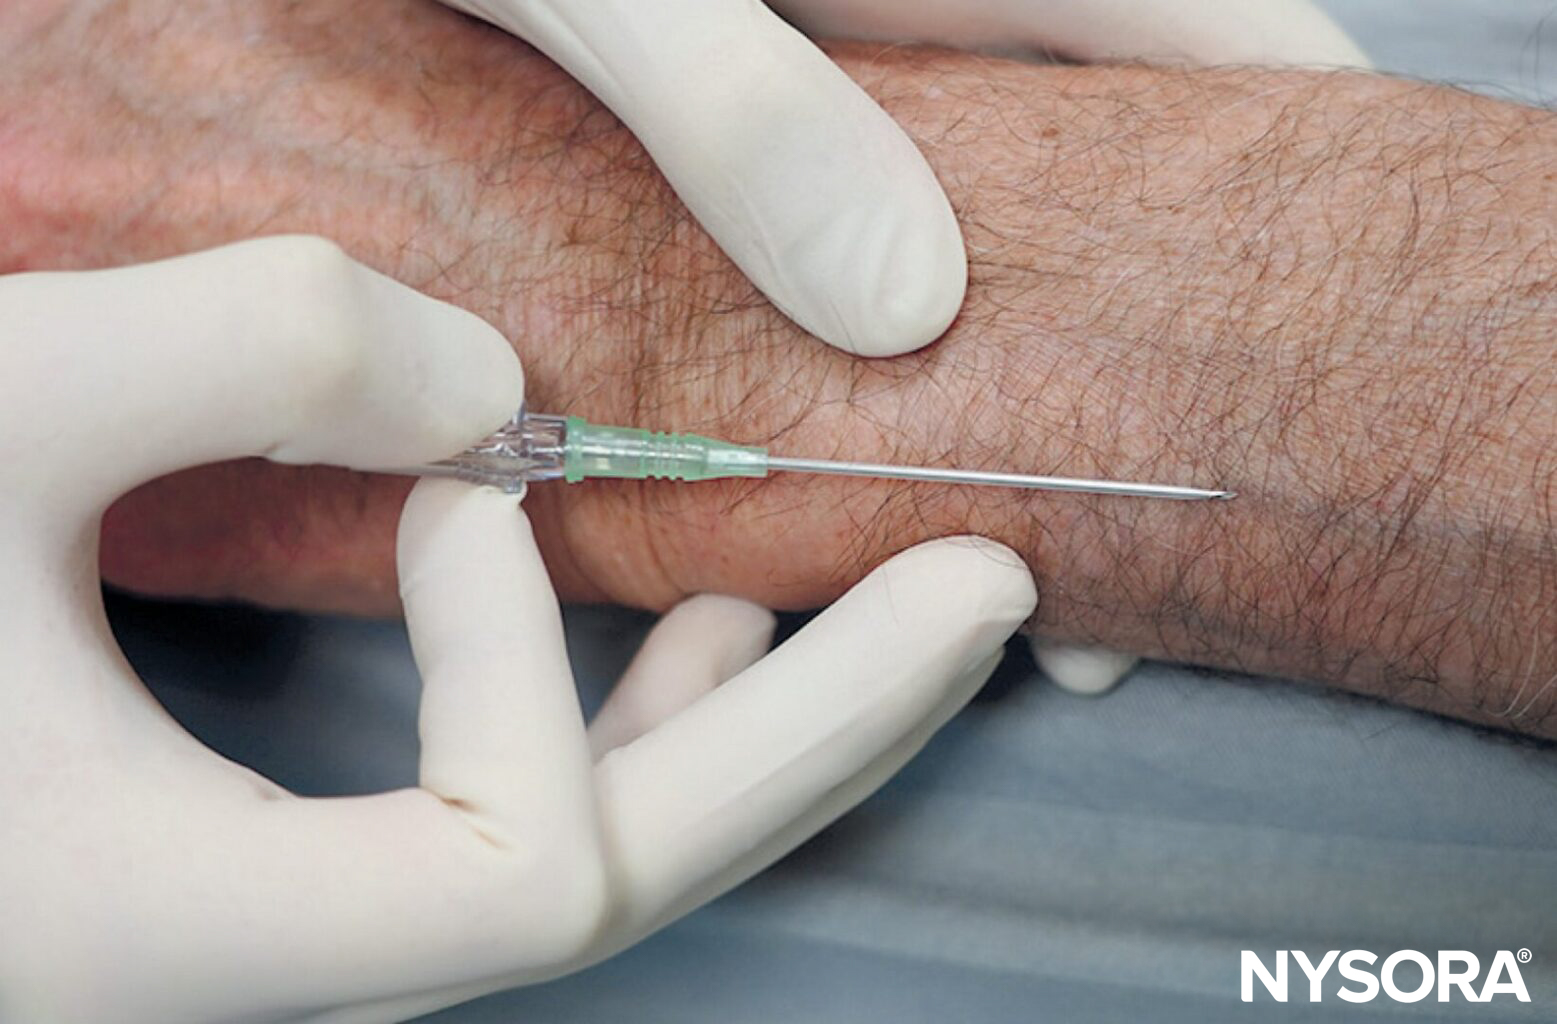
- Bend the needle: Consider bending the needle. While counterintuitive at first and requiring some practice, this tip can make all the difference in tight places where it is difficult to assume a low needle angle to advance the needle-catheter system into the vein sufficiently. Bending the needle-catheter system allows the elevation of the needle tip and ensures it stays within the superficial path of the vein. Tip: Needle bending is one of the pro’s secrets.
- Simulator training: Consider practicing on a vein simulator and practice the needle bending in simulation first, before using this technique in patients.
Bend the needle-catheter system to raise the tip (A) and maintain a low angle to ensure that the needle-catheter system remains within the superficial path of the vein (B).
VIDEO: https://youtu.be/dR5GDgvC8gU
- Ultrasound guidance: Using ultrasound is a no-brainer! Where the ultrasound machine, skill, and suitable deep veins are available, ultrasound can make all the difference. However, ultrasound is inefficient for superficial veins, as these lack sufficient depth to track the needle into the vein. Moreover, even the slightest pressure on the ultrasound transducer will flatten the superficial vein, making it impossible to cannulate.
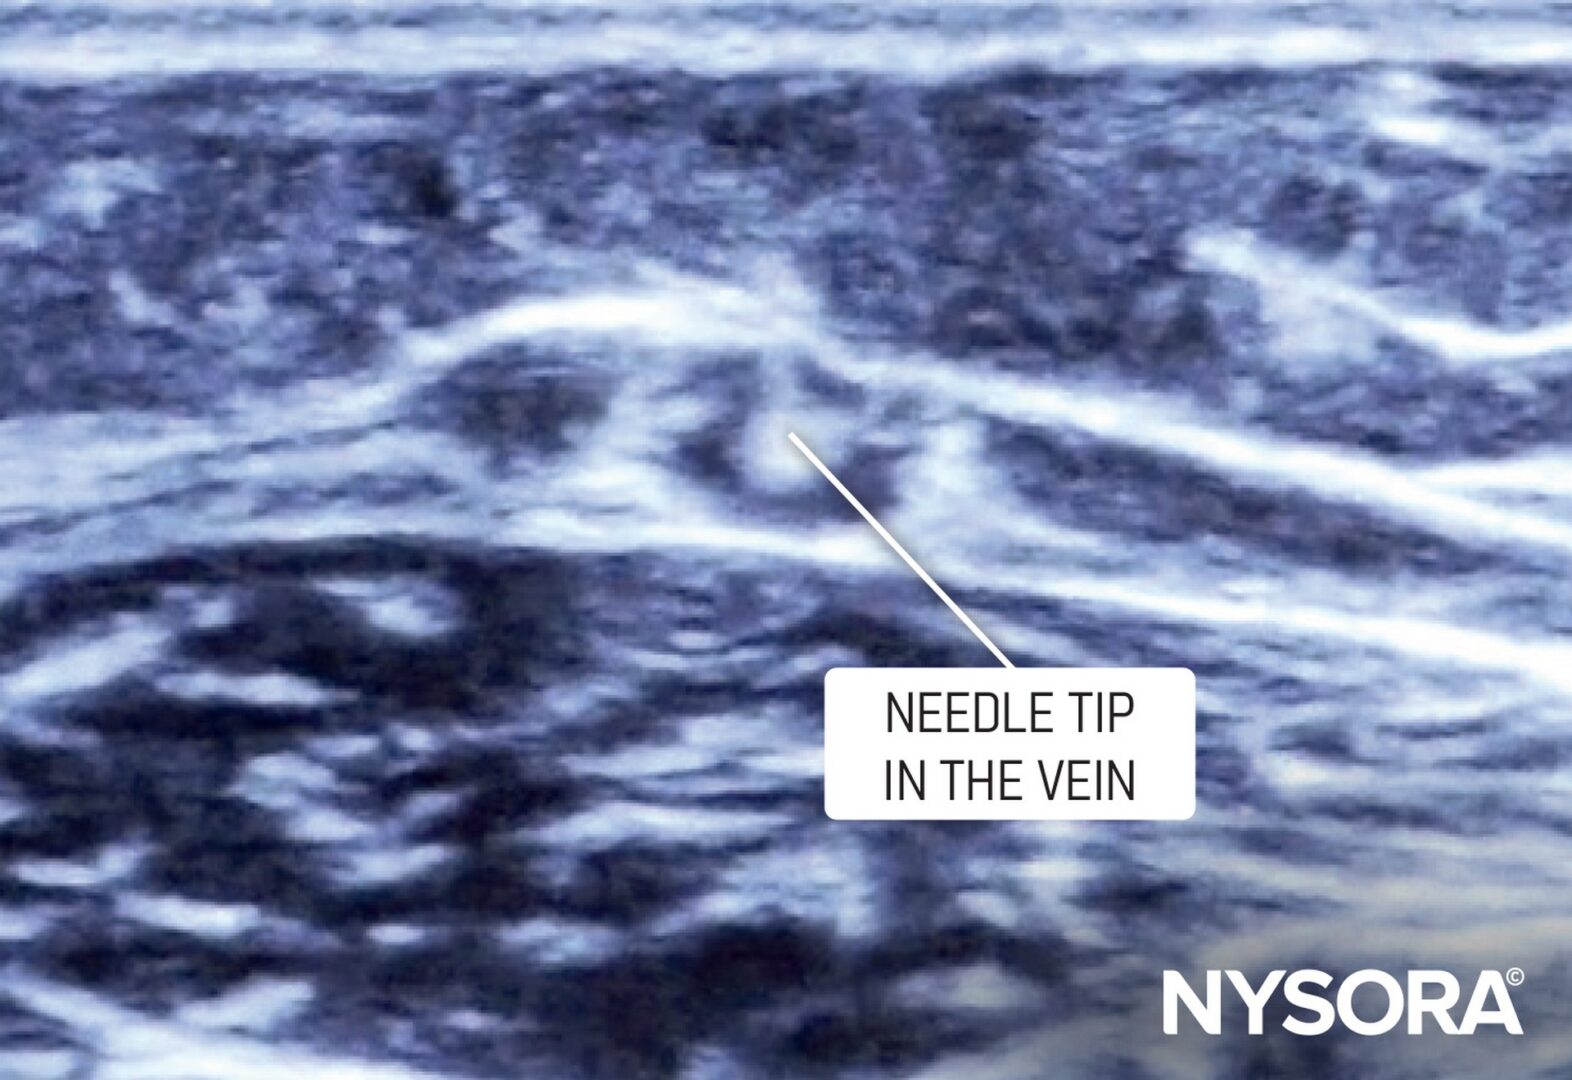
Out-of-plane visualization of the needle tip inside the vein.
Use ultrasound guidance to visualize difficult veins
- Vein visualization technology: Devices such as near-infrared vein finders highlight veins that are not visible to our eye. These devices use infrared or a bright light source to highlight the veins. They are explained in more detail in Chapter 11: Intravenous Access Training and Assistance Tools of NYSORA’s ‘Mastering difficult IV Access’ manual.
- Esmarch technique: Wrap a rubber band (Esmarch, 10-15 cm or 4-6 inches in width) around the limb to encourage blood flow to the superficial veins to visualize them.
- Cannulation of the forearm: Start at the axilla and extend the band to just below the elbow.
- Cannulation of the foot: Wrap the band from the knee downward, covering the popliteal area.
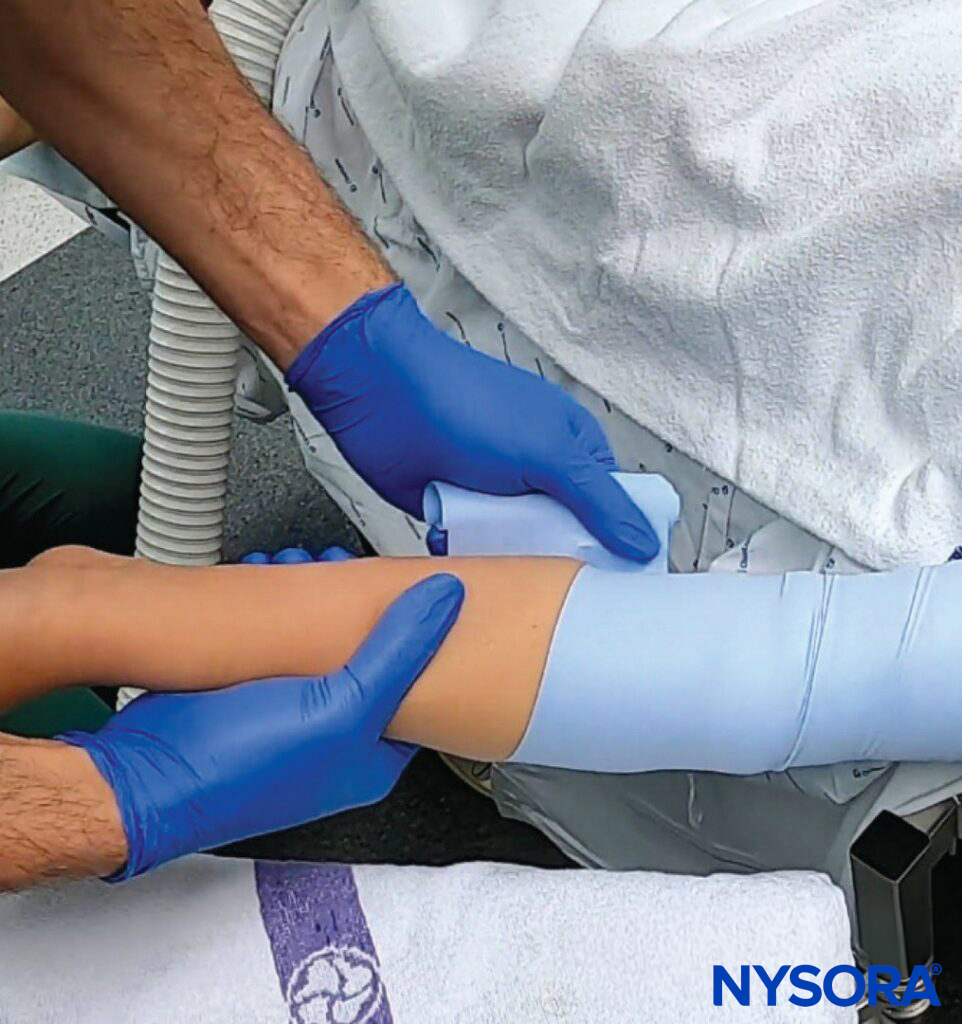

The Esmarch technique is used to fill the superficial veins with blood. Mechanism: Tourniquet effect and displacement shift of deep venous blood into superficial veins by elastic bandage application.
TIP
Watch the video to understand how to apply this very useful technique fully.
VIDEO: https://youtu.be/hz4SLPVEhgA
Deep veins
Inserting a peripheral IV catheter into a deep vein is generally a more complex procedure than inserting one into a superficial vein, and it is typically not the first choice for peripheral IV access without ultrasound guidance. Deep veins are located further beneath the skin’s surface, are typically larger, and are held firmly by surrounding connective tissue, preventing them from shifting or rolling. Although difficult to visualize, deeper veins are stronger and more stable than superficial veins. Rely on palpation to locate them.
Palpate veins. Veins sometimes may not be visible, but they can be felt by their firmer feel compared to adjacent tissue.
Here are some practical tips.
- Palpate: Identify deep veins more by touch than by sight. Veins may not always be visible, but they can be felt by their firmer feel compared to adjacent tissue.
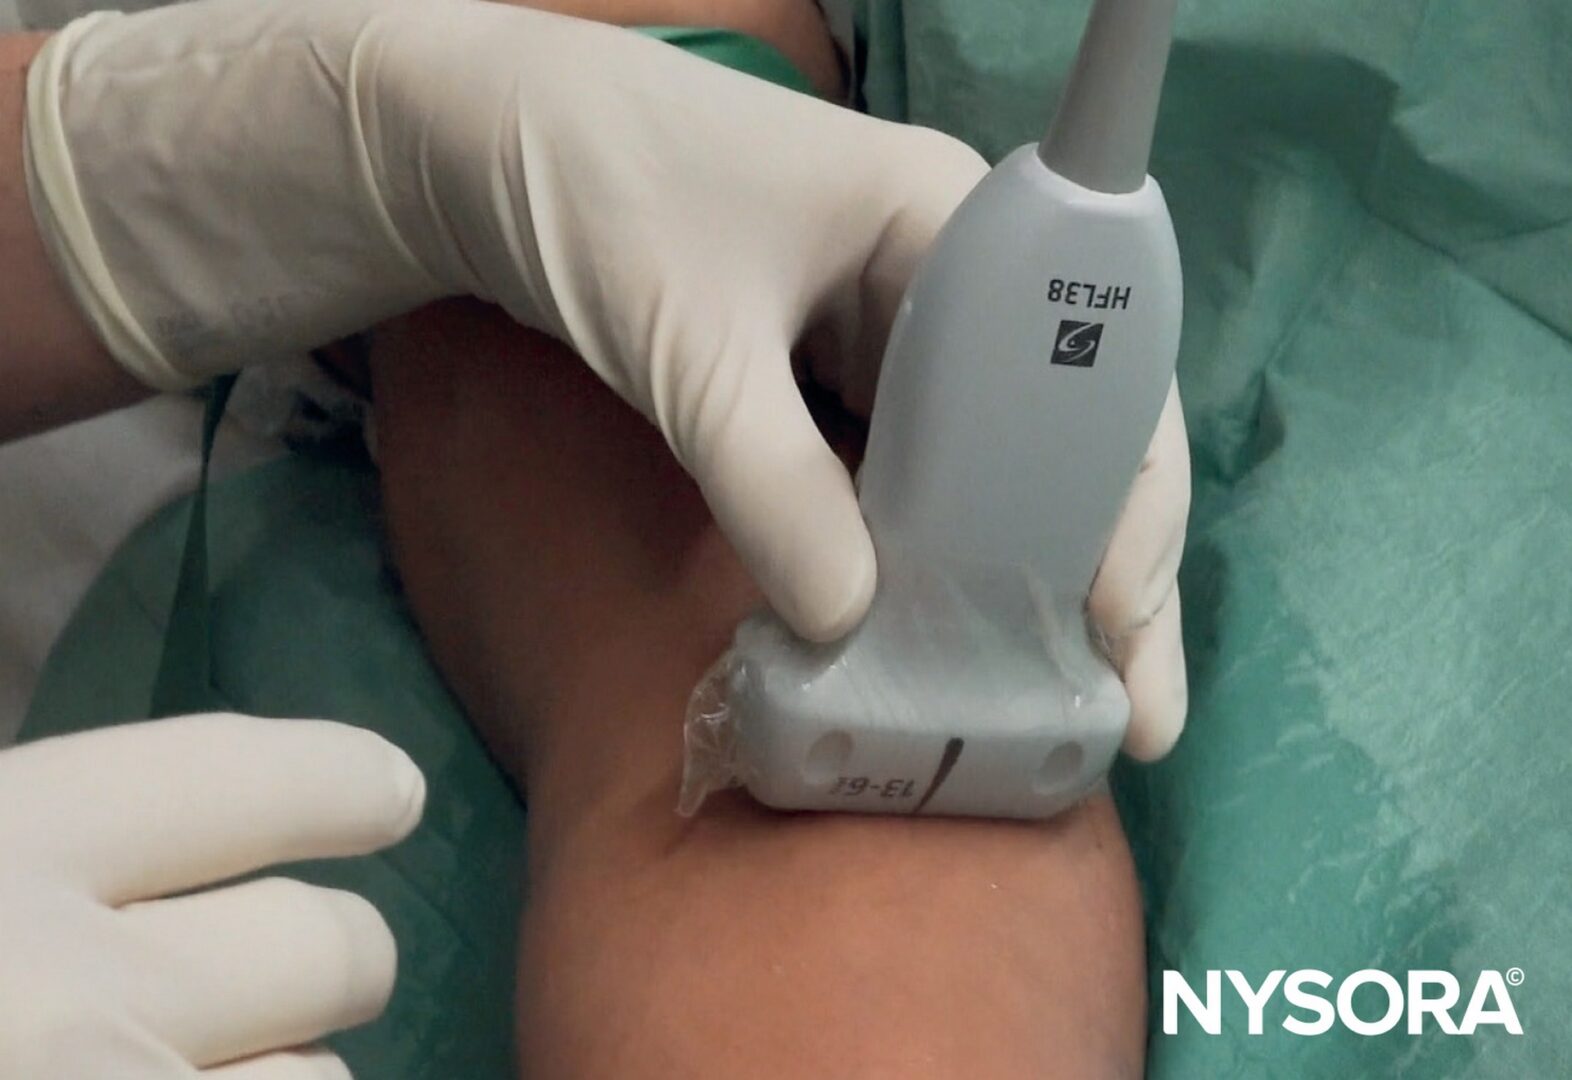
- Ultrasound: Often necessary for deep vein cannulation to help locate the vein and to guide and confirm the needle’s insertion. For step-by-step instructions on using ultrasound guidance for deep vein cannulation, we refer to Chapter 9: Ultrasound-guided Peripheral Venous Access in NYSORA’s ‘Mastering difficult IV Access Manual.’
- Use longer catheters: A longer IV catheter is usually required to ensure the catheter can reach and remain within the deep vein. Depending on the planned therapy, the needle gauge may also need to be larger.
- Optimize tourniquet position: Position the tourniquet further up the arm to enhance venous distension, making even deeper veins more palpable.
- Strategic limb positioning: Adjust the limb’s position to take advantage of gravity, which will help fill the veins, including the deeper veins.
- Insertion angle: The technique for deep vein cannulation requires a steeper insertion angle than for superficial to reach the veins.
- Experience and training: Because of the complexity and potential for complications (like deep tissue injury or nerve damage), this procedure is typically performed by a healthcare provider with advanced training and experience in deep vein cannulation.
- Consider alternative access: If locating a deep peripheral vein proves challenging, consider ultrasound-guided IV access of deeper veins or a CVC where long-term or high-volume access is necessary.
TIPS
- Be mindful of risks: Accessing deeper veins involves additional risks, such as potential harm to arteries, nerves, or surrounding structures.
- Approach with patience: Unfortunately, multiple attempts are often part of the process. Apply an organized approach to multiple attempts to avoid repeating needle insertion in the same direction as previously failed attempts.
- Approach with care: If unsuccessful after several attempts, do not hesitate to ask a colleague for assistance or take over.
- Troubleshooting: Use an organized approach to multiple attempts. Change ONLY ONE element of the technique at a time. This prevents you from repeating the same error over and over again. “Fan” the needle angle left-to-right first while keeping the angle of the insertion constant. If unsuccessful, change the angle and repeat the “fan” technique. If done properly, this allows you to perform several meaningful attempts with different needle paths.
Fan technique inserts the needle with small, organized changes in needle orientation to increase the success rate of cannulating a vein. This technique is particularly useful with deeper veins that can not be easily seen.
VIDEO: https://youtu.be/BCWnfs-lgxI
Tortuous or twisted veins
Tortuous veins are veins that have become enlarged and twisted, winding, or convoluted. Instead of following a relatively straight path, these veins have multiple curves or loops due to aging, atherosclerosis, hypertension, loss of connective tissue support, genetic defects, or diabetes mellitus.
Tortuous veins can present a challenge during IV cannulation or venipuncture, leading to multiple unsuccessful venous access attempts, increased patient discomfort, and a higher likelihood of complications such as bruising or hematoma.
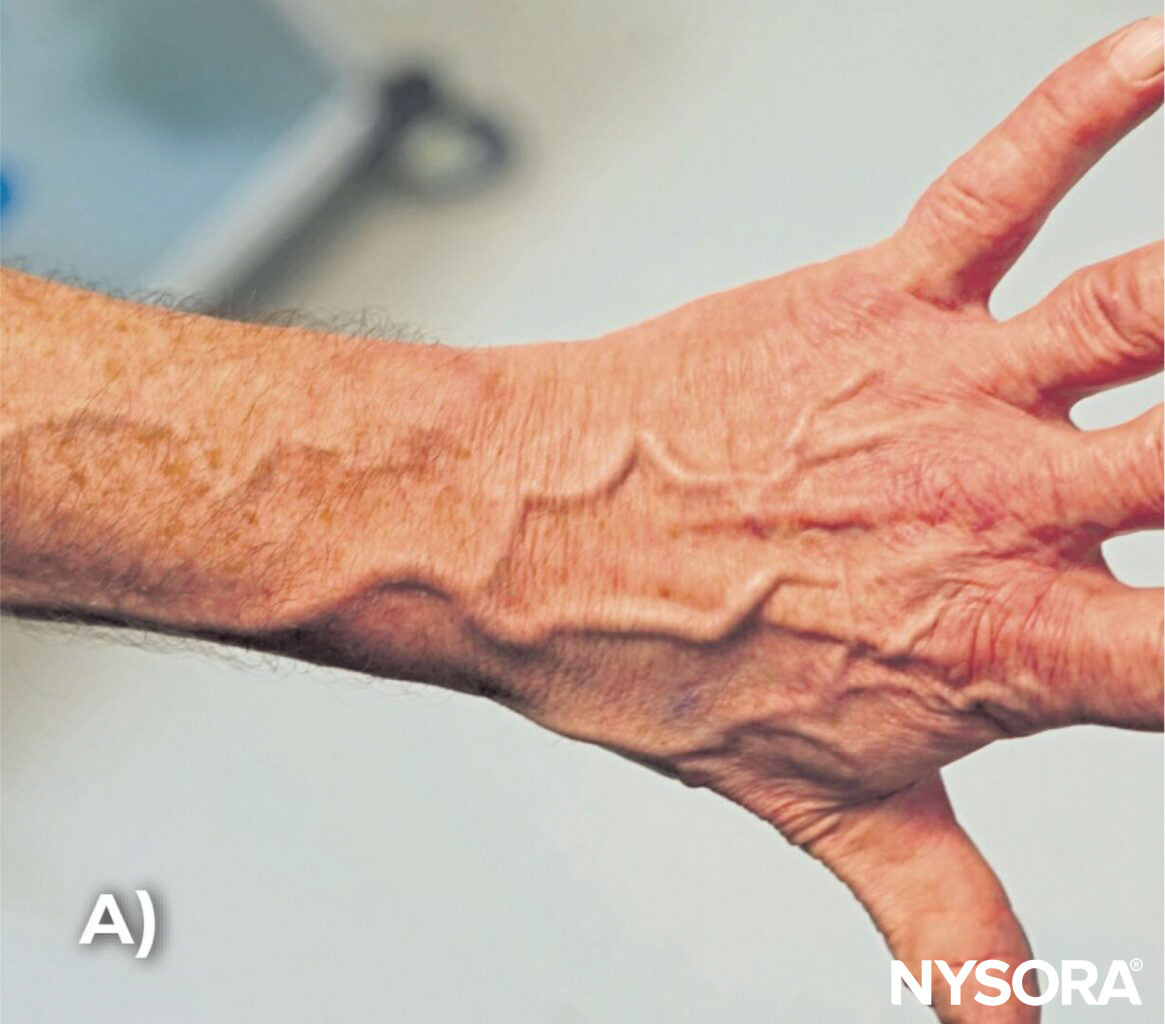
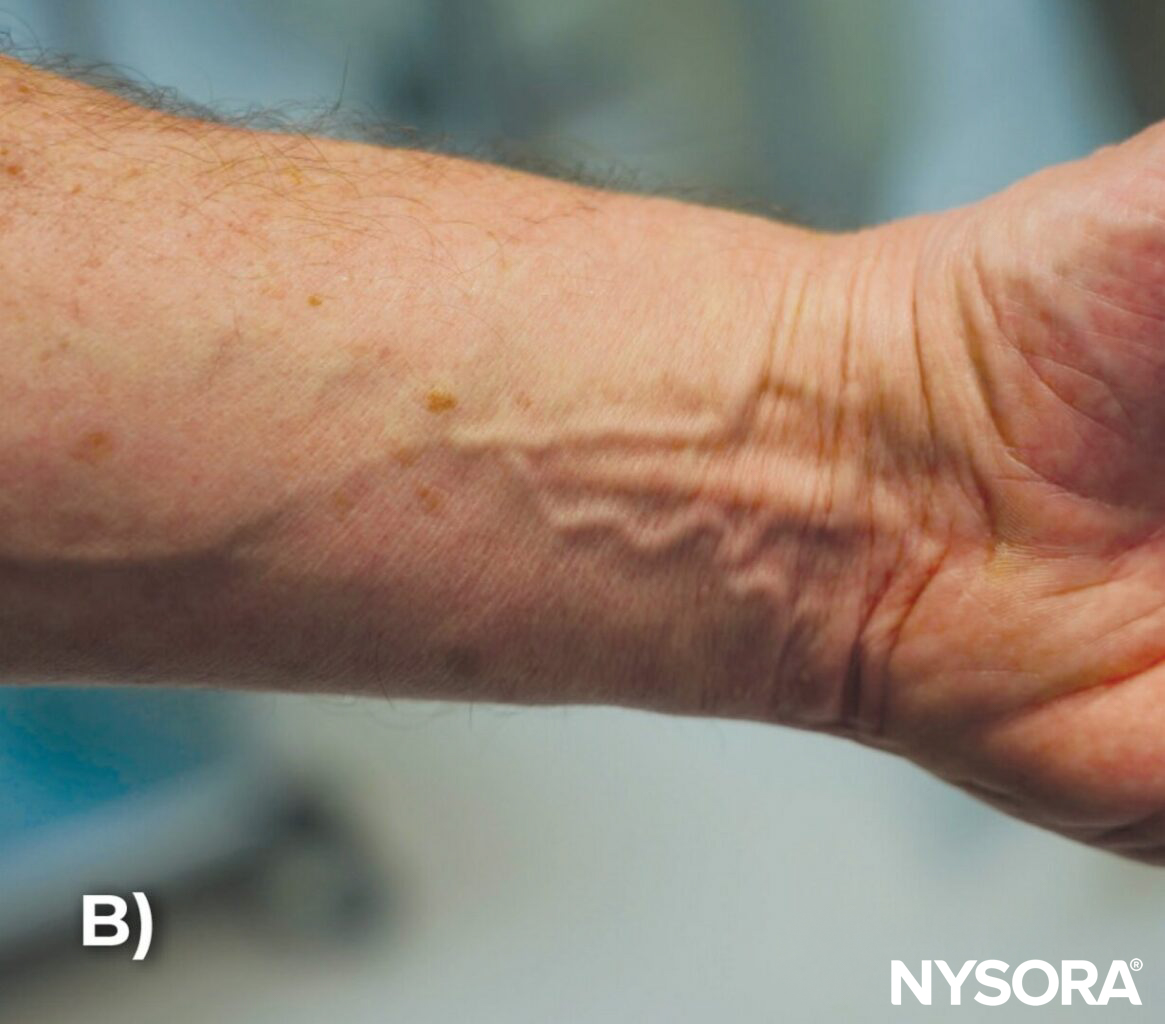
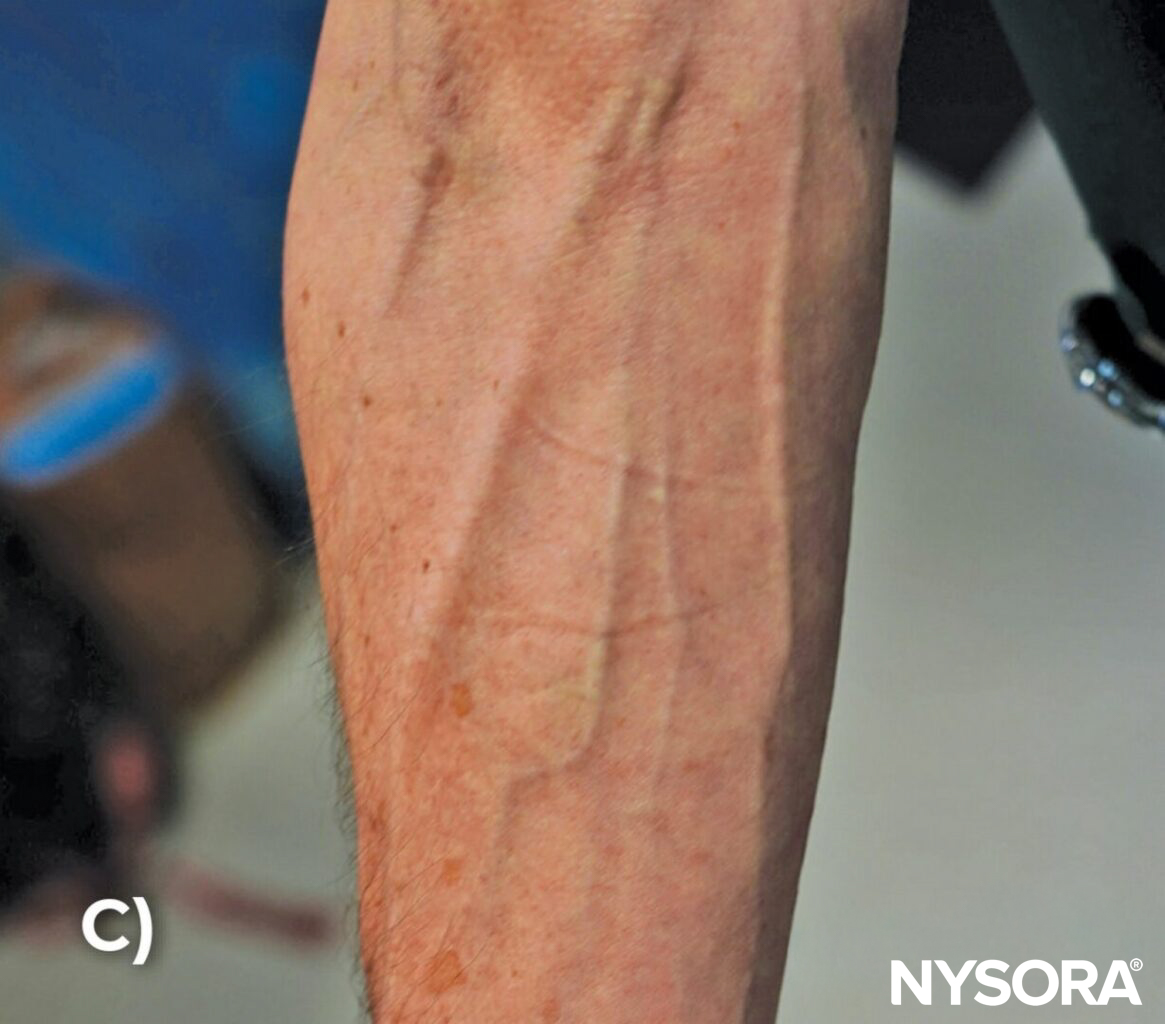
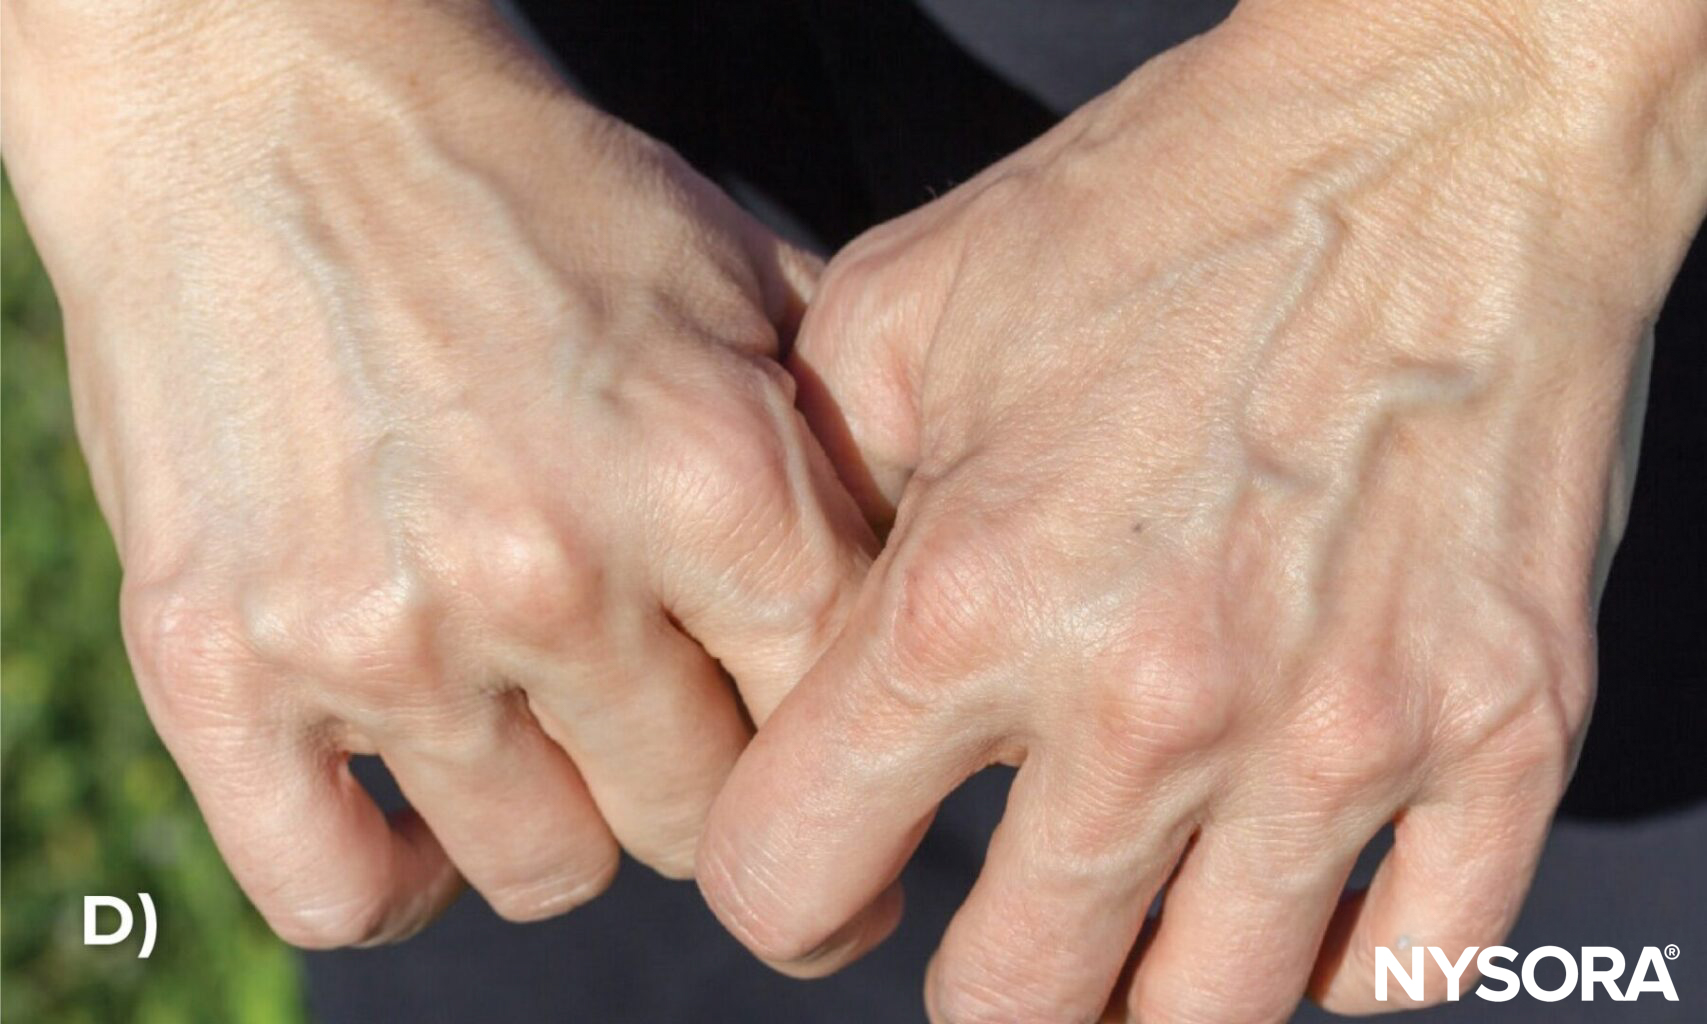
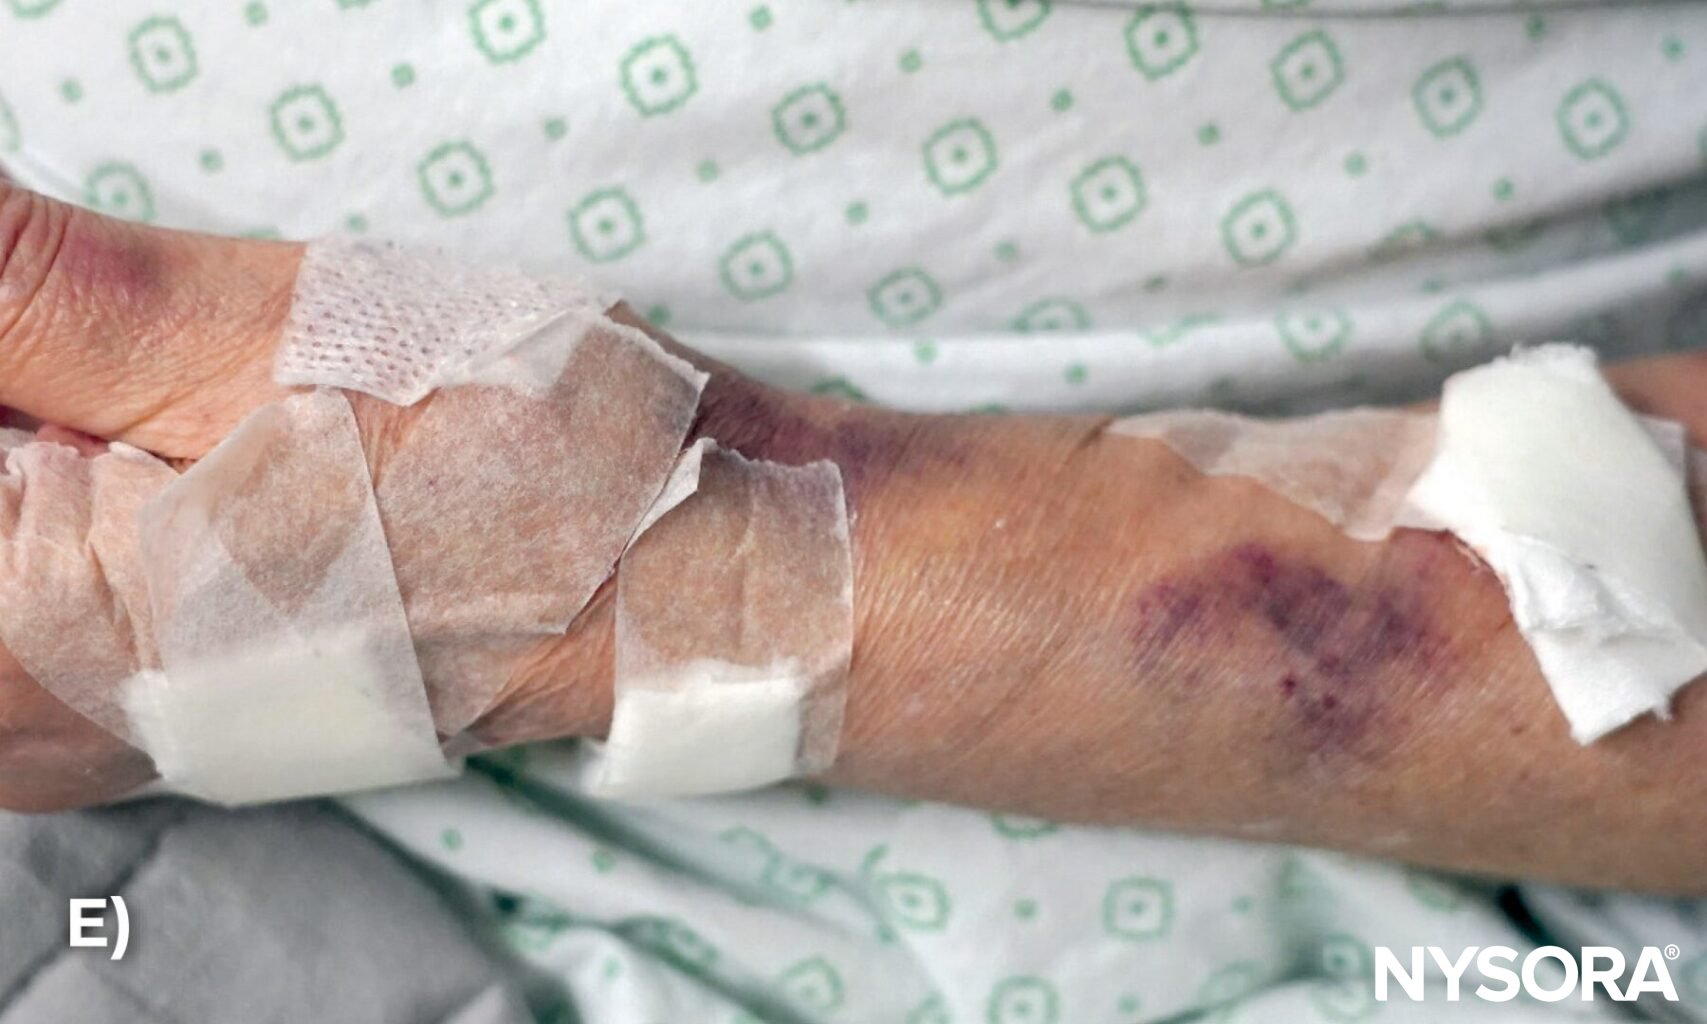
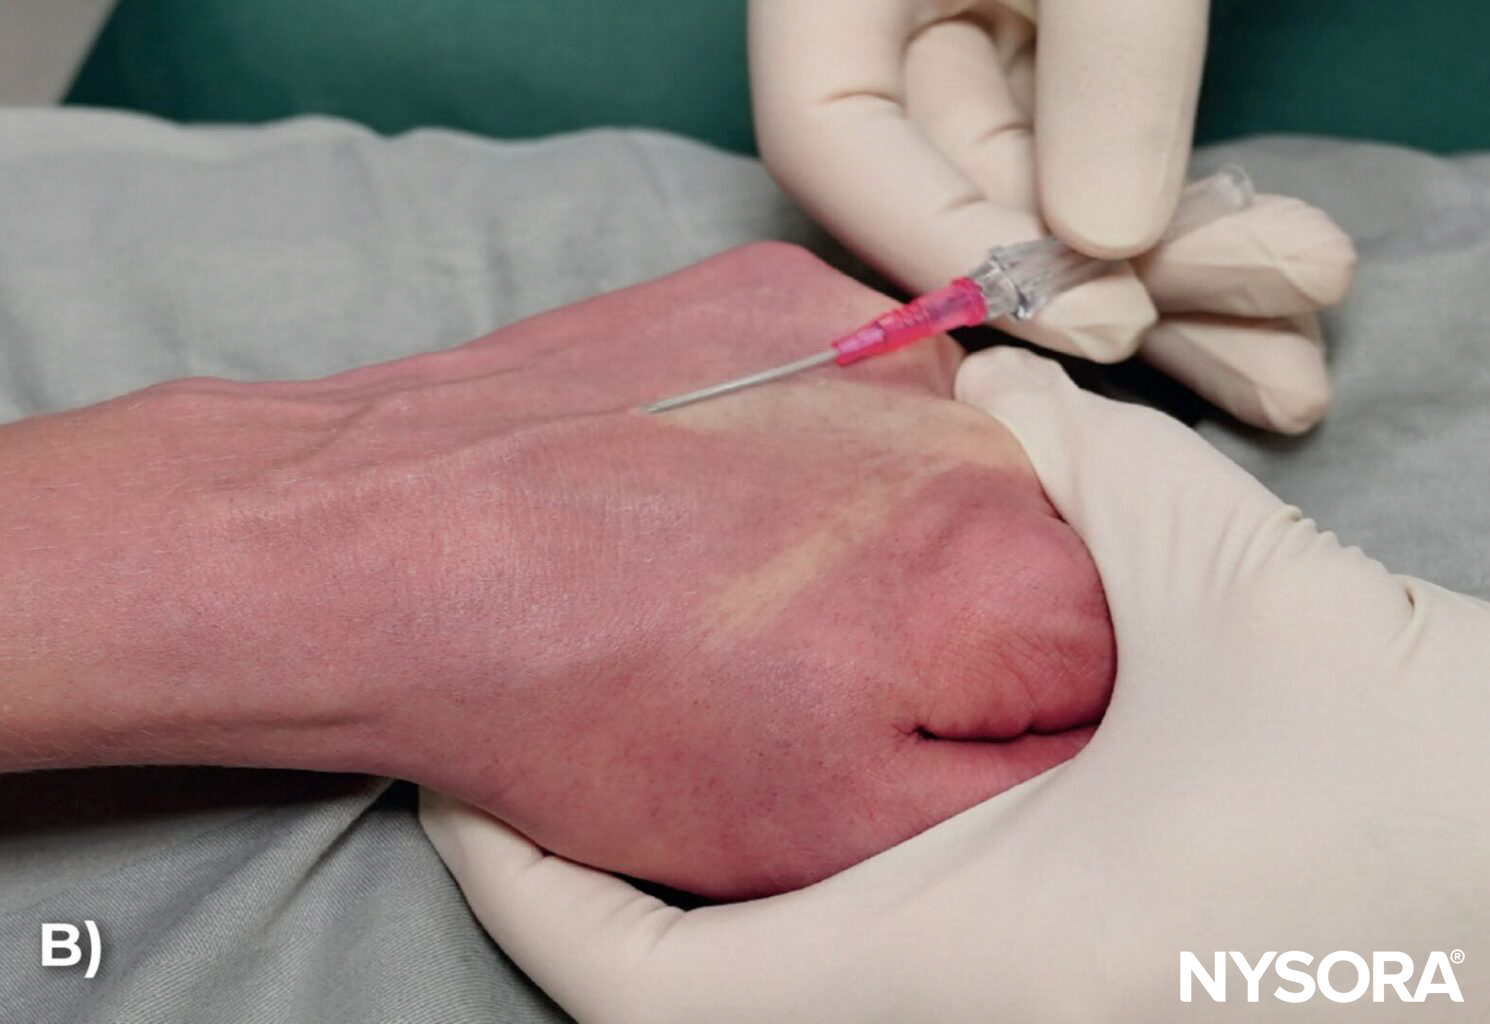
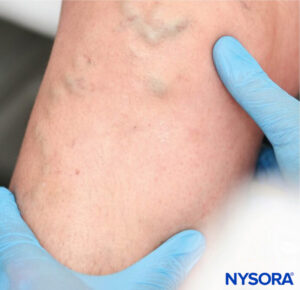
A) Tortuous veins on the dorsal side of the hand, B) on the palmar side of the hand, and C) in the upper extremity. D) Tortuous or twisted veins in the hand. E) Multiple unsuccessful venous access attempts due to tortuous veins.
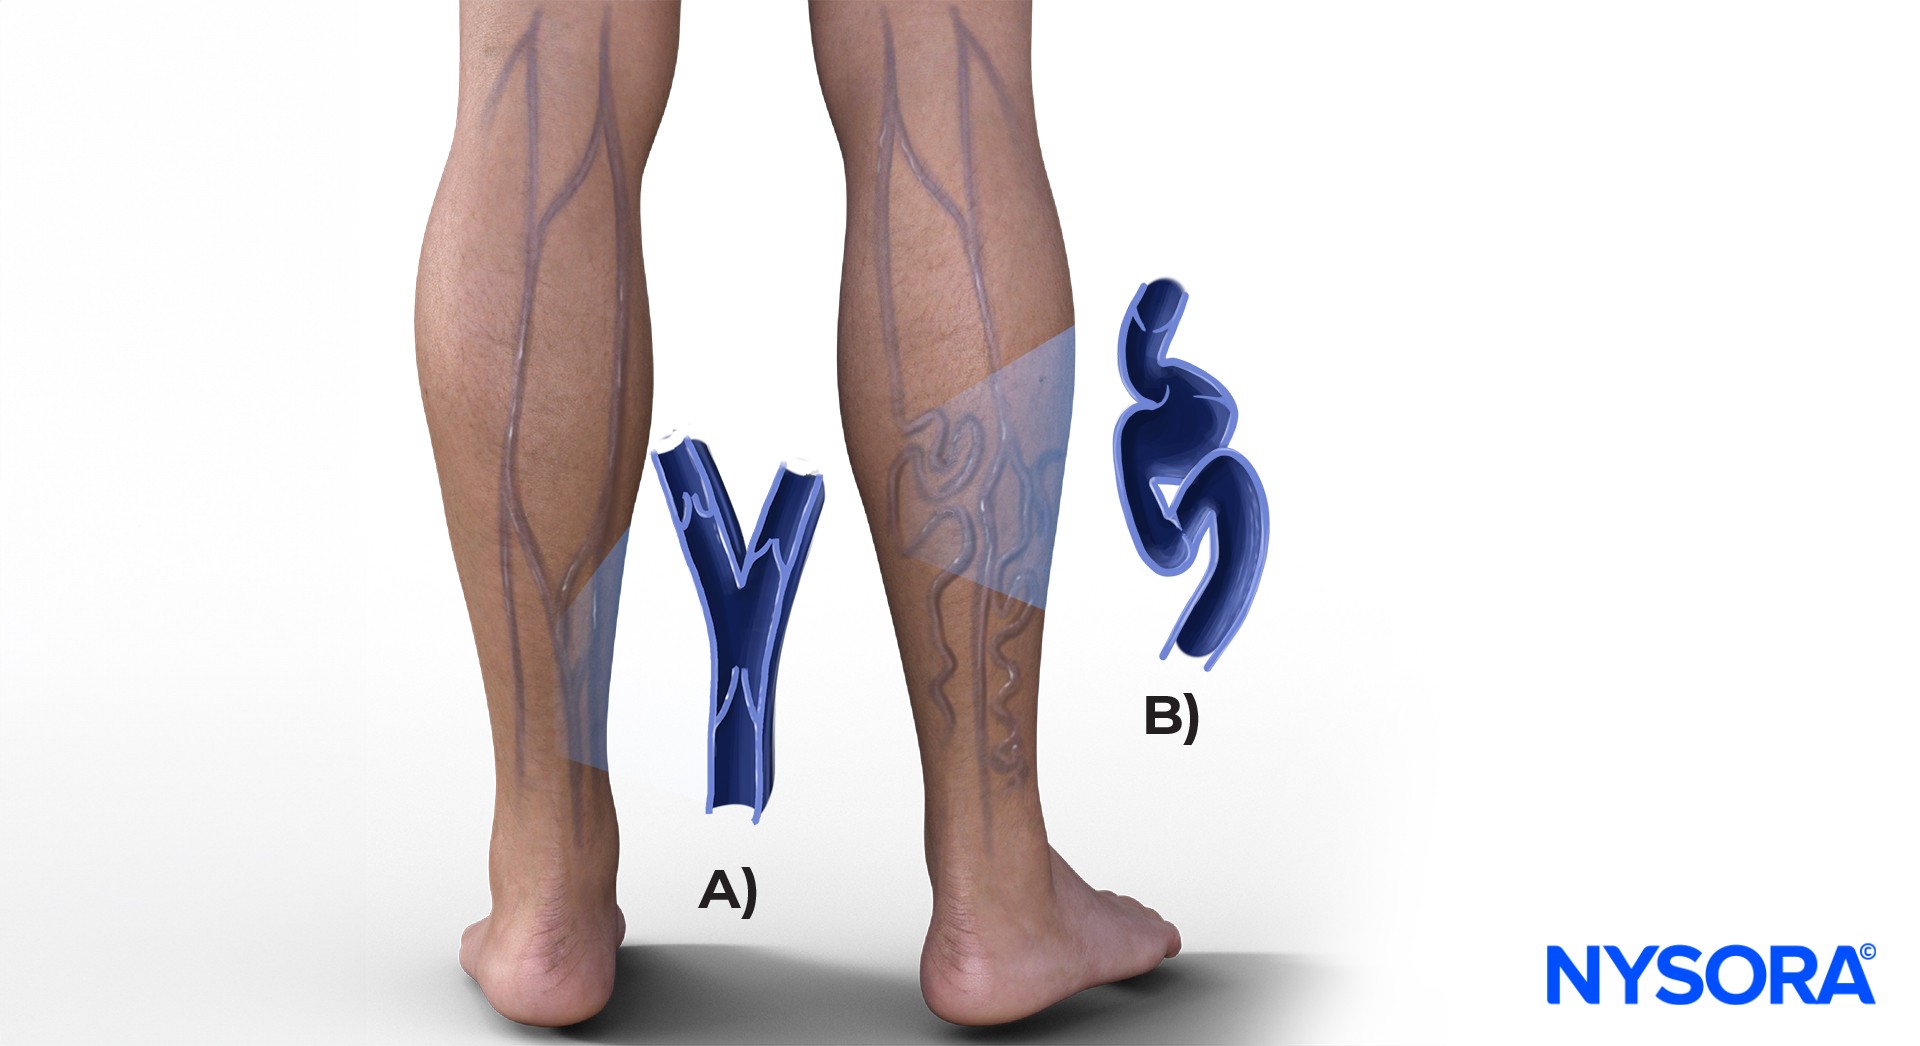
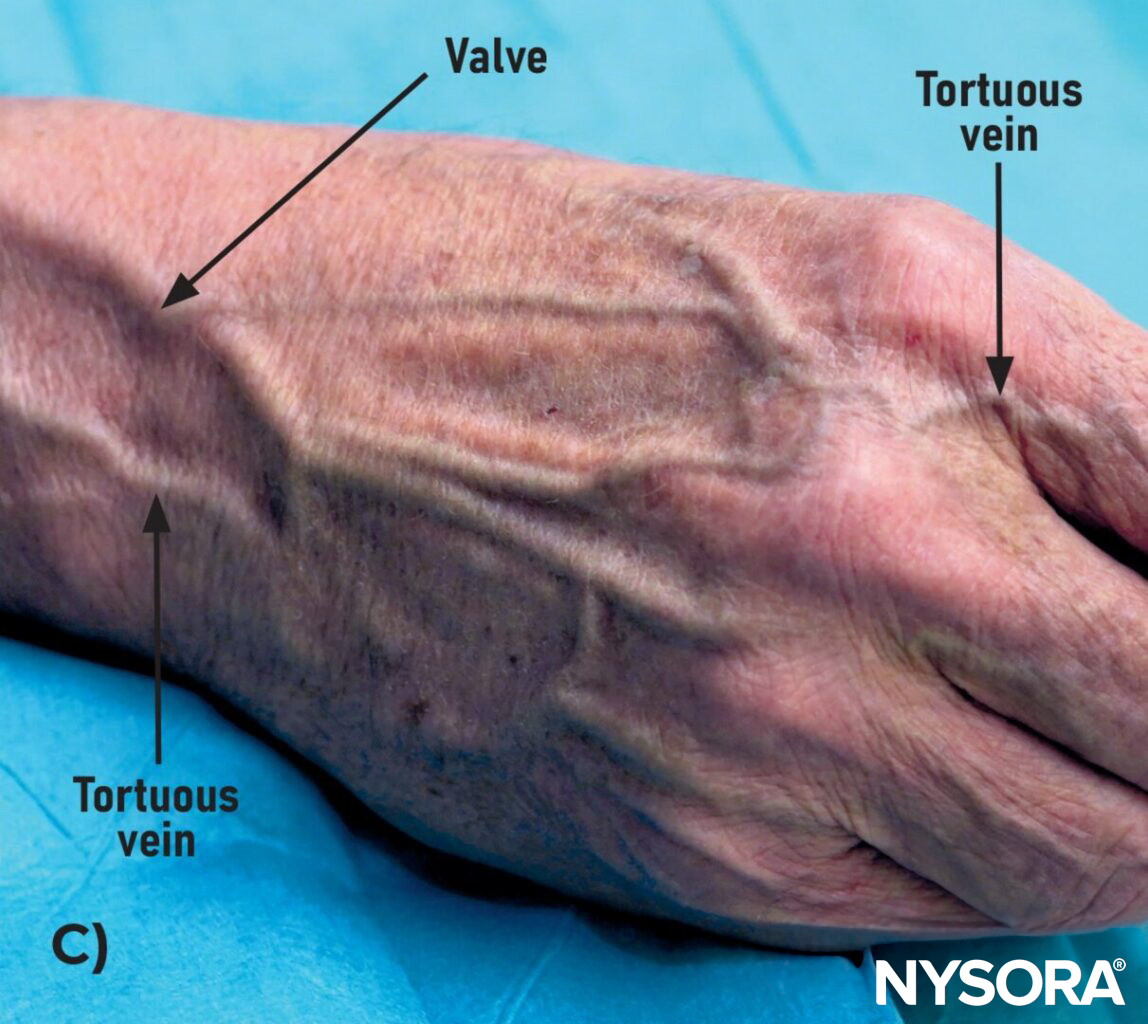
Examples of tortuous veins. A) Normal, lesser saphenous vein. B) Tortuous, varicous lesser saphenous veins. C) Tortuous veins, prone to rolling.
Understanding tortuous veins
Though these veins are visible and easily palpable and deceivingly simple to cannulate, they have lost their elasticity, making them prone to rolling when approached by the needle.
VIDEO: https://youtu.be/0JMxCtD6eXg
Strategies for tortuous veins
If a tortuous vein is the only option for IV cannulation, select one with visible branches (tributaries) that stabilize the needle entry or a relatively straight one.
Needle insertion:
- Maintain a low angle with the needle to minimize the risk of vein rolling.
- Employ a swift-entry method; rapidly push the needle in to prevent the vein from rolling away. This technique is called the “snake bite” technique.
VIDEO: https://youtu.be/B_M4tI5S4zQ
Counter traction method:
- Place a finger below the intended insertion site and gently pull the skin downward to create tension to stabilize the vein.
Tortuous veins in the lower extremity. Technique for vein stabilization.
Common mistake: Some advise stretching the skin on either side of the vein to create tension. This can sometimes be useful. However, this may cause the vein to appear less full and become harder to visualize. Additionally, it reduces the chances of blood return upon needle insertion.
VIDEO: https://youtu.be/8-5D7z-oGiE
Blown veins
Blown veins occur when the needle either goes through the vein or causes it to burst, resulting in blood leaking into nearby tissue. A bruise over the vein is often noticeable, sometimes with a mark from a previous attempt. This can happen due to using the wrong needle size, inserting a needle at the wrong angle into a vein that rolls easily, or fragile vein walls, common in older or chronically ill patients.
If a catheter insertion is attempted below a damaged vein, the infusion might go into the paravenous tissue instead of the bloodstream, causing problems (tissue inflammation, swelling) and discomfort for the patient. Quickly and effectively dealing with a blown vein is important to avoid further problems, such as blood clot formation, infection, or delays in important IV treatment.
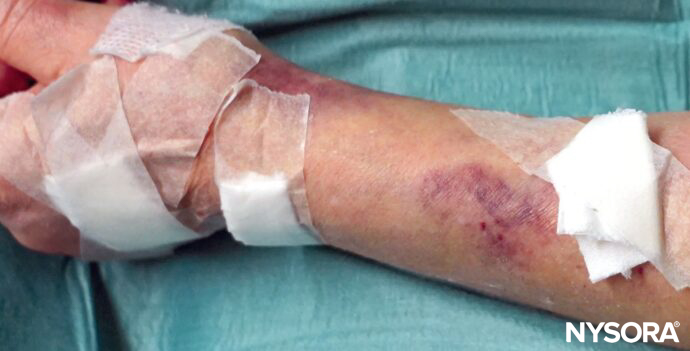
Blown vein resulting in hematoma formation.
Multiple failed attempts in a patient will lead to bruising and discoloration due to the extravasation of hemoglobin.
What to do when a vein blows
- Look proximally: Attempt to insert the IV proximally to the blown vein. This is because the section of the vein above the injury remains intact and can still provide a reliable route for IV access. Inserting a catheter distally to the blown vein may result in paravenous leakage from the blown vein proximally.
- Seek alternatives: Choose a different vein or a different extremity altogether.
Practical advice
- Start distally: If there is no hematoma yet, start at the most distal section of the vein. This strategy may preserve more sections of the vein for use in subsequent attempts when IV cannulation proves difficult.
- Catheter replacement: A working catheter is usually replaced after 3-4 days of use. When inserting a new IV in the same vein, position it proximal from the previous insertion site or, if required, opt for an entirely different vein.