Release the tourniquet and retract the needle
- Leave the tourniquet on until the cannulation’s success is confirmed to maximize the benefits of the tourniquet to keeping the veins enlarged.
- Release the tourniquet.
VIDEO: https://youtu.be/AuyxS5Zb_cc
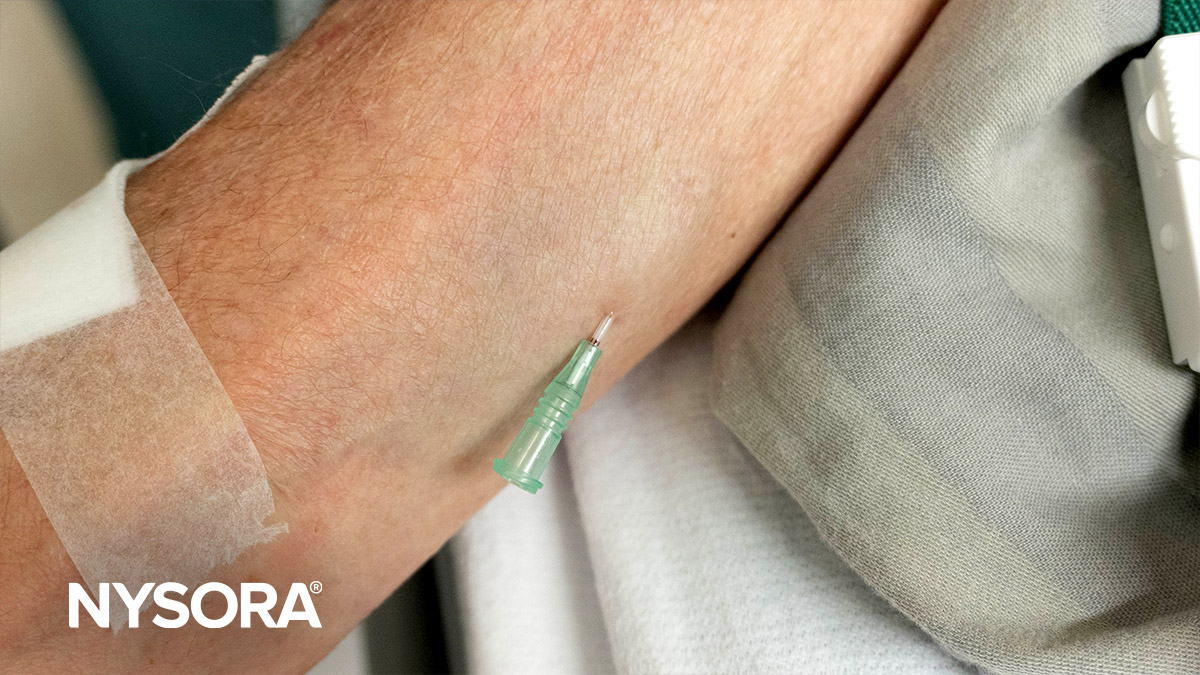
- After successful catheter placement, place the thumb above the insertion point to prevent blood leakage.
- Remove the needle.
- If needed, withdraw any blood for laboratory testing using a syringe or phlebotomy adapter.
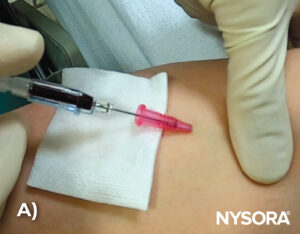
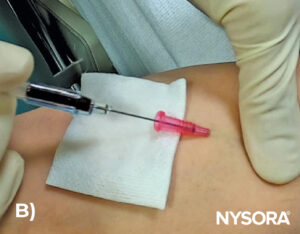
A) The thumb is placed above the insertion point to prevent blood leakage. B) Retract the needle.
VIDEO: https://youtu.be/dofpiGJT9ck
Attach the IV tubing and secure the catheter
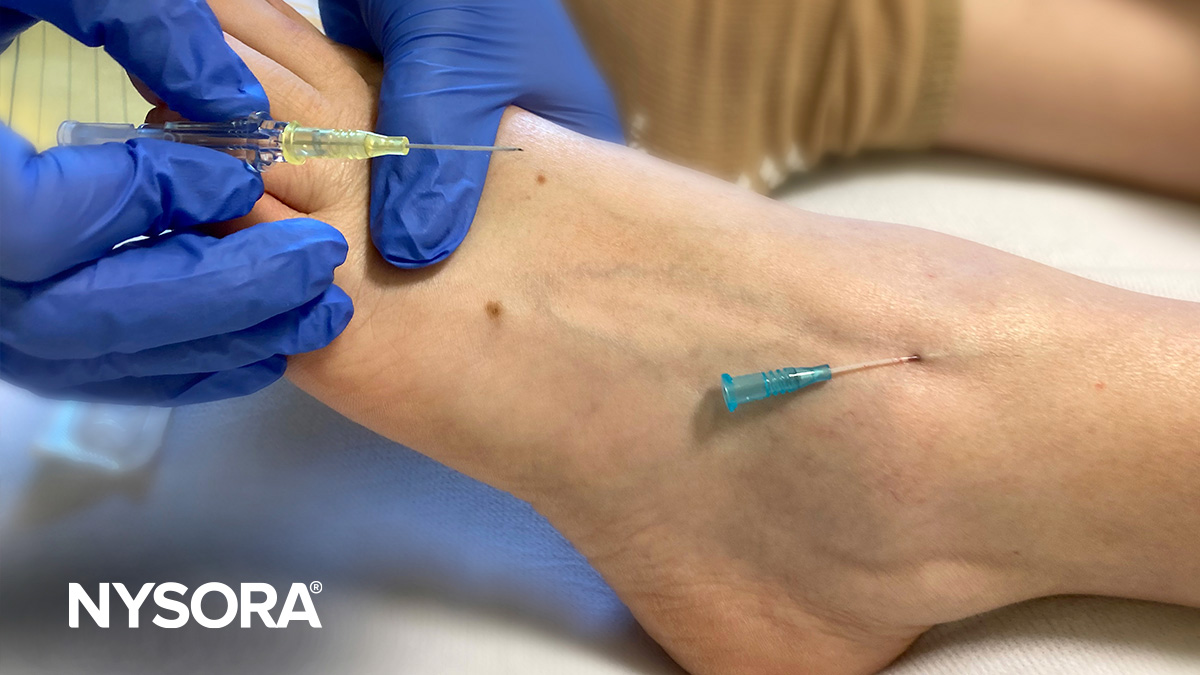
- Attach the end of the IV tubing or the saline lock to the catheter hub.
- Start the infusion or flush the saline lock (inject about 5 mL of saline in rapid, small pulses).
- Fluid should flow freely. Check for any swelling or edema around the insertion site, which may indicate paravenous infusion.
- Wipe blood and fluid from the insertion site carefully to prevent accidentally dislodging the catheter.
- Cover the catheter with a transparent occlusive dressing.
- Use one of many different techniques and devices to secure the catheter and prevent its accidental dislodgement.
- For example, if the design of the IV allows, loop the IV tubing and tape it to the skin away from the IV insertion site to prevent accidental traction on the tubing from dislodging the catheter.
- Apply an immobilization board as necessary.
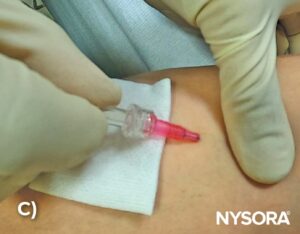
C) Attach the IV tubing to the catheter hub.


A) Check the IV flow. B) Secure the catheter with an occlusive dressing. C) Tape the tubing away from the IV insertion site to prevent dislodgement.
TIP
- Double-check that the tourniquet has been removed after securing the IV (common mistake).
VIDEO: https://youtu.be/fCN0Ekq4UEM
VIDEO: https://youtu.be/vX5D90Fd9TM
VIDEO: https://youtu.be/_9mRhtNWR5I
VIDEO: https://youtu.be/kgZVELYuWQs