 Nerve Blocks App
 Pain Medicine Assistant App
 POCUS App
 IV Access App
 MSK Knee App
 VetRA App
 Nerve Block Manual
 Regional Anesthesia Updates
 Anesthesiology Manual
 Anesthesiology Review
 Anesthesia Updates 2025
 Anesthesia Updates 2026
 Pediatric Anesthesia Updates
 Airway Management Updates
 US Interventional Pain Manual
 Pain Medicine Updates
 Mastering Difficult IV Access
 PACU Nursing Manual
 RA Veterinary Manual
 About
About
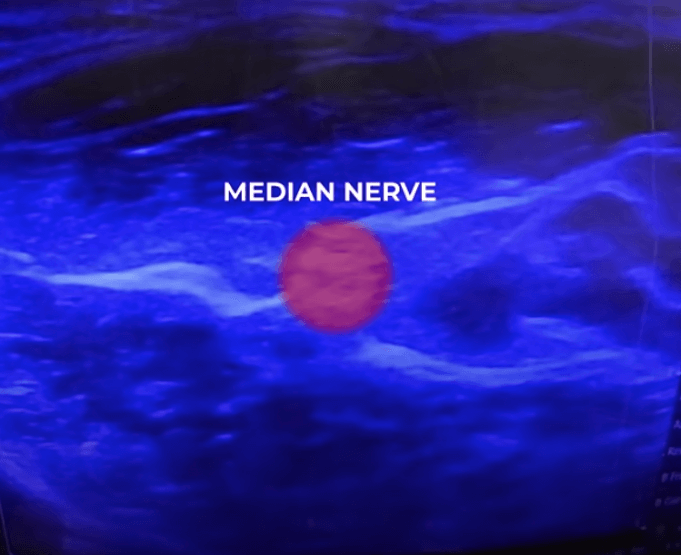
We will demonstrate the performance of the median nerve block for carpal tunnel surgery together with four simple ultrasound machine adjustments that can improve the image for the given procedure.
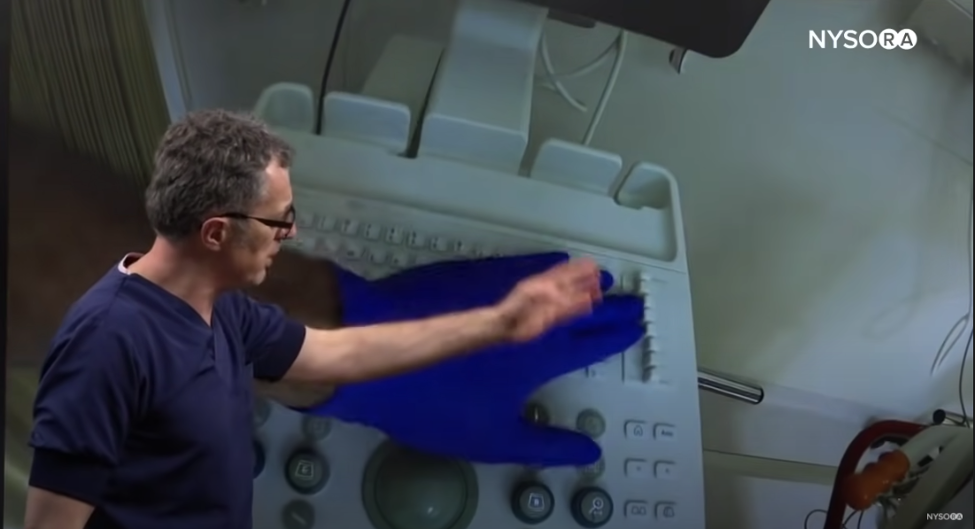
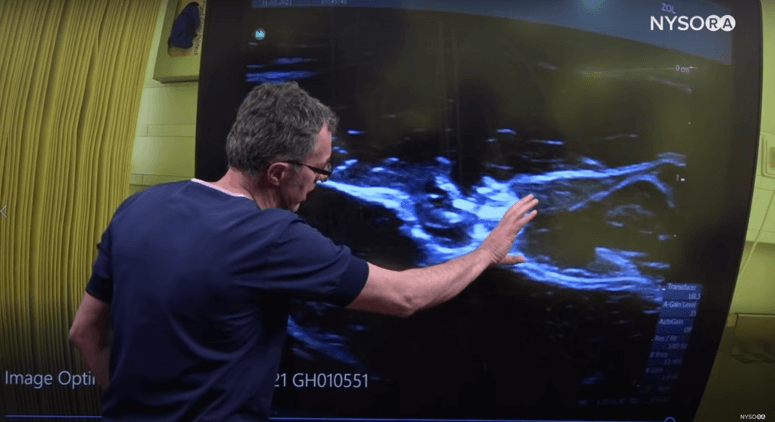
We will show you how to improve an ultrasound image in 15 seconds using the BK 3000 machine. Before using the machine, many adjustments need to be made since it is an older machine. You should briefly inspect the machine to check whether someone has tampered with it.

BK 3000 ultrasound machine.
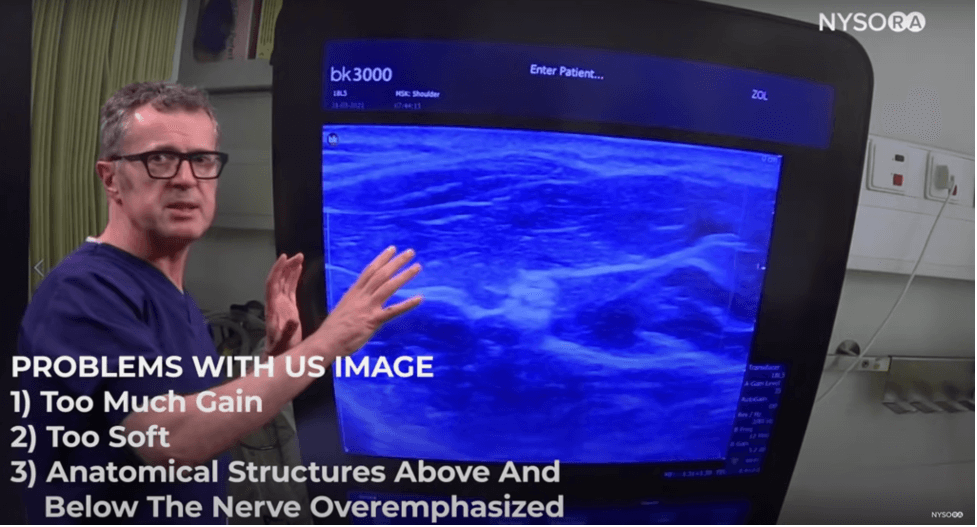
Without any adjustments, we get the following image:
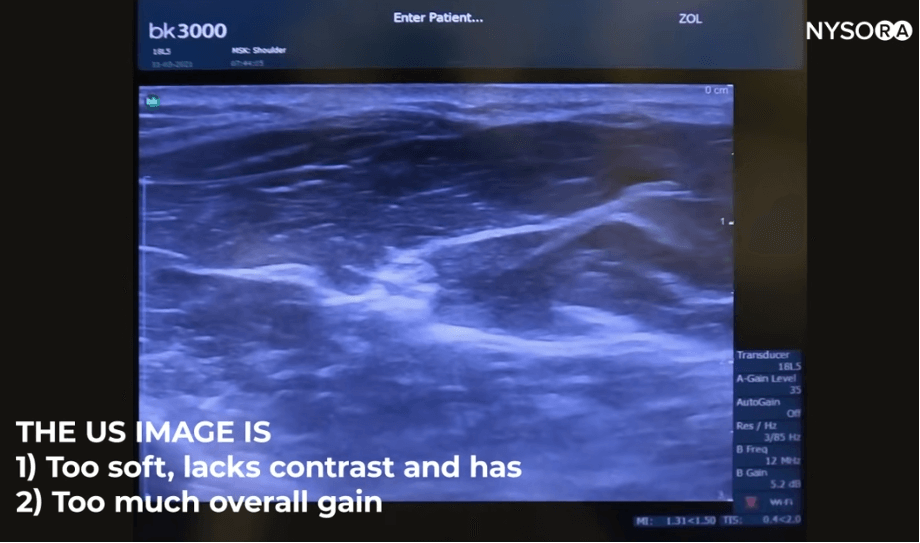
A screenshot of the ultrasound image without any adjustments.
To Dr. Hadzic’s perception, the image is too bright on the top and bottom. There is also no contrast of the median nerve and particularly not of the fascial sheaths of interest.
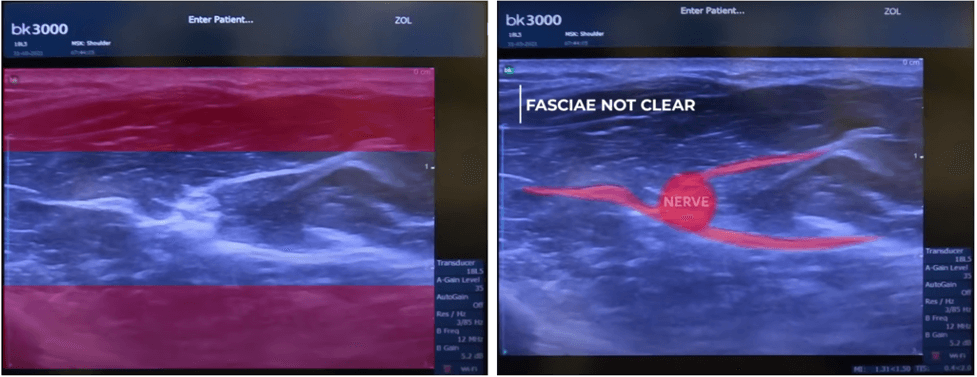
A screenshot highlighting the brightness of the ultrasound image and lack of contrast.
We would like to bring the time gain compensation back in the middle to a neutral position and then adjust the image accordingly.
Dr. Hadzic demonstrates how to bring back the time gain composition to the neutral position.
This gives us the following image:
Dr. Hadzic explains the problems with the ultrasound image after bringing the time gain compensation back to a neutral position.
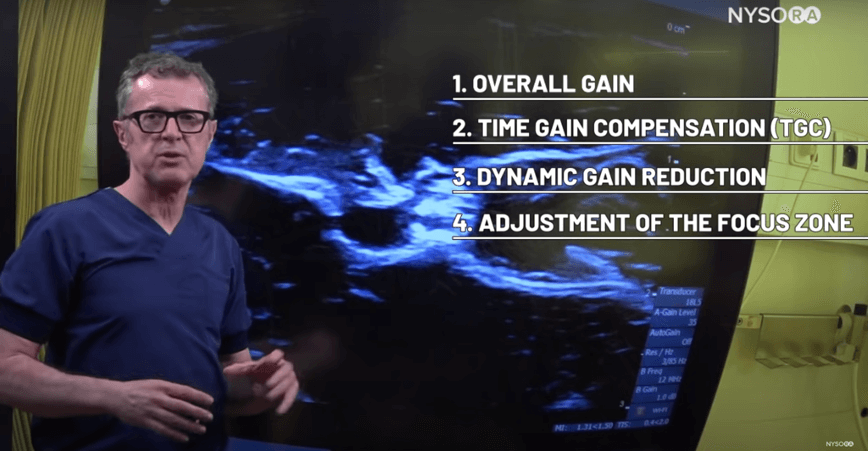
We will improve the image by using the following four ultrasound adjustments:
- Gain: The image is too bright.
- Time gain compensation: There is too much gain on the top of the median nerve and the fascia of interest, and there is too much gain on the bottom of the image.
- Dynamic range: There is not enough contrast around the median nerve and fascial sheaths surrounding the nerve, which is the most important for this particular block. Ultrasound waves have their own dynamics; some signals returning to the ultrasound transducer are very weak, while others are extremely strong. When the dynamic range is very wide, the difference between weak and strong signals is too high to get an image with enough contrast to recognize the fascial planes. The contrast in this image is 90 decibels, and we would like to compress that. Once we compress that, we will get a lot tighter focused and sharper contrast image, necessary to recognize these fascial planes in the median nerve block procedure. It is more important to visualize the fasciae enveloping the median nerve than the nerve itself. These fasciae are the fasciae between the superficial and deep flexors of the wrist. The local anesthetic should be injected in this space to accomplish a median nerve block.
- Focus point: The focus point is below the level of the anatomical structure of interest in this image. We would like to raise the focus point to the level of the structure of interest.
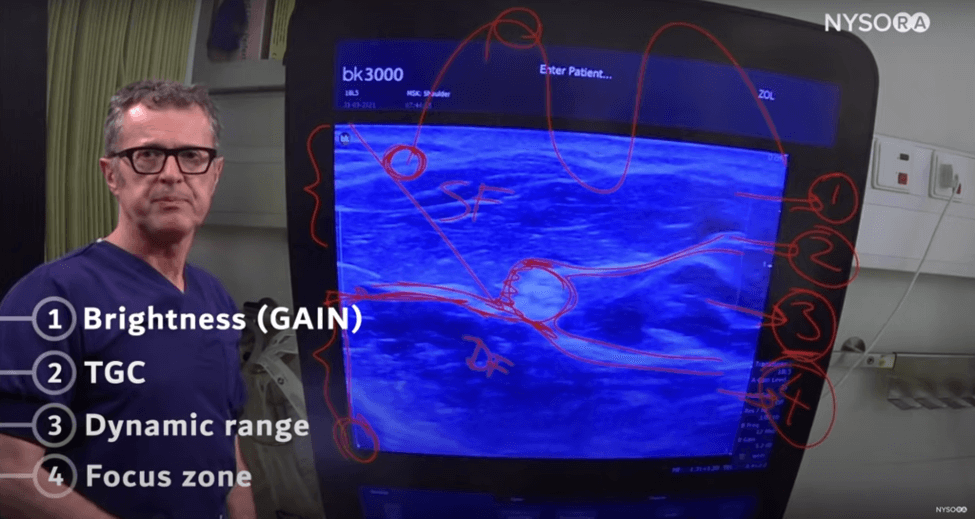
Dr. Hadzic explains the four adjustments to optimize the ultrasound image.
- Overall gain
The first adjustment is the overall gain. After reducing the gain, you can actually visualize the structure of the superficial and deep flexor muscles. You are also starting to see the fascial sheath that envelops the median nerve a bit better.
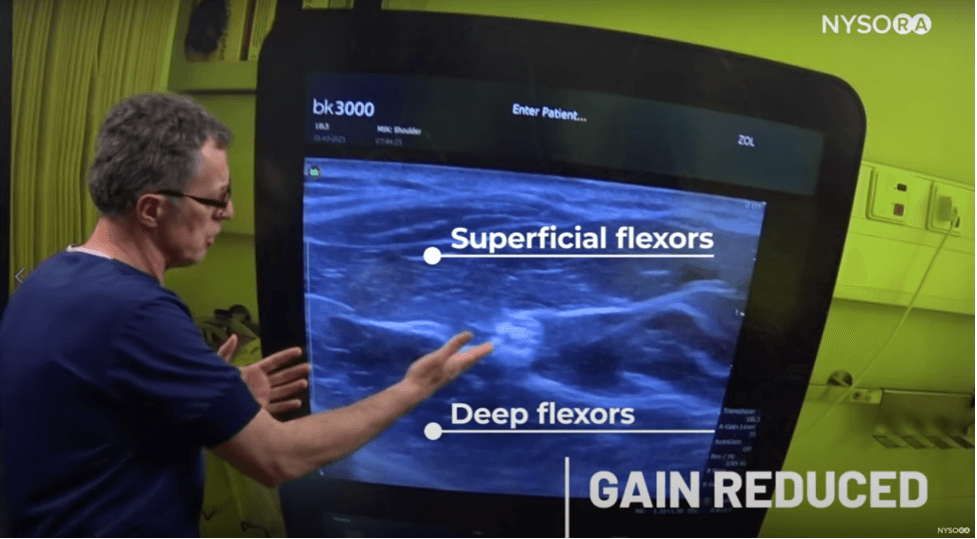
Reducing the gain improved the image. The superficial and deep flexors are better visualized.
- Time gain compensation
The second adjustment is the time gain compensation. We are going to turn down the gain in the upper part and lower part of the image. We left the center image untouched because we already adjusted the overall gain. This is the resulting image that we get.
Resulting ultrasound image after time gain compensation adjustment.
You can already visualize the fascial sheath layers better, but there is still some more work.
- Dynamic range
The third adjustment is the dynamic range. We can see that the dynamic range has been set to 90 decibels. This is a huge dynamic range, meaning that there is a great difference between the weak and strong signals. The dynamic range is compressed to 65 decibels to get an edgier image. After manipulating the dynamic range, the image is focused more tightly. Some structures on the top and bottom of the image are lost, but these were not of interest. The fascial sheath is substantially accentuated, so now we know exactly where to go to accomplish the spread of the local anesthetic around the median nerve.
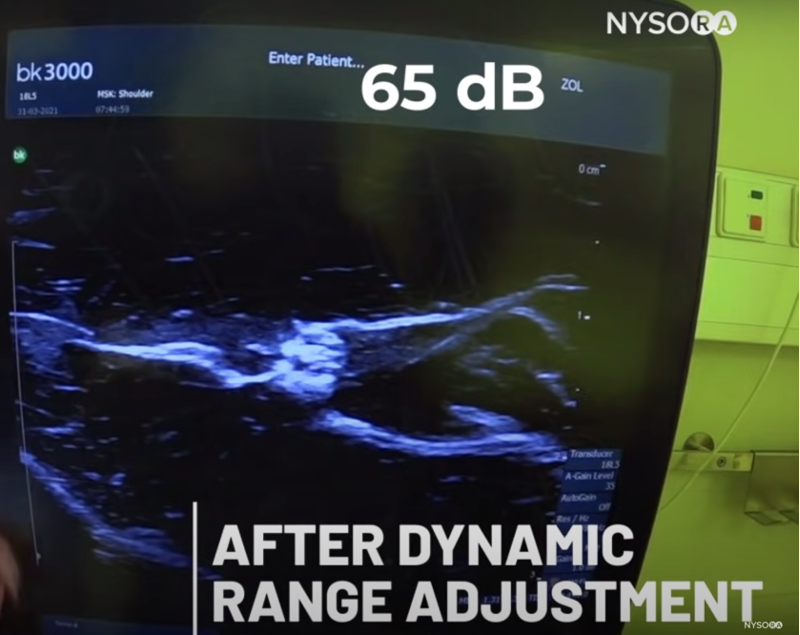
The dynamic range is reduced from 90 dB to 65 dB to create an edgier image.
- Focal point
The only thing left to improve is to check whether working with a focal point can get even more granularity or more resolution to the image. The cursor on the left indicates where the focal point is, which is currently below the level of interest. We will use the trackball to raise the focal point to the level of the nerve. That is about the best we can do for this particular purpose.

Resulting ultrasound image after moving the focal point up to the level of the nerve. The dotted line indicates the focal zone.
We do not have to spend much more time, and these adjustments take about 10 to 15 seconds and make a huge difference, particularly when the imaging is not that great.
Median nerve block
The transducer is placed in the transverse position, and the needle is inserted out-of-plane to pass it into the tissue plane between the fasciae of the superficial and deep flexors. This is important because the nerve block is an injection of local anesthetic in the space containing the nerve. For the median nerve block, that space is the fascial sheaths superficial and deep flexors of the wrist. The idea is that the needle passes in between those two fascial planes. The local anesthetic injection separates the fasciae, allowing the local anesthetic to spread around the nerve in all directions underneath the fasciae.
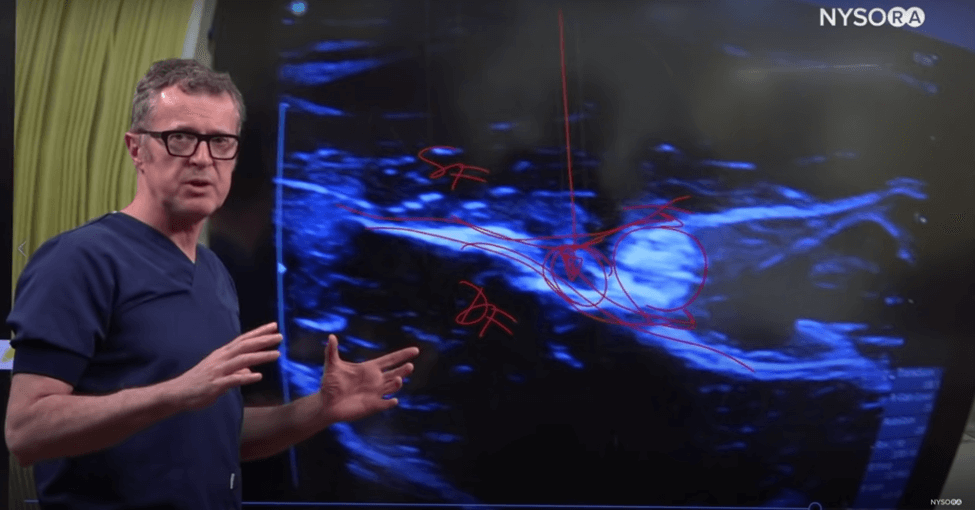
Dr. Hadzic demonstrates the target for injection and local anesthetic spread for a median nerve block.
This is why we spend so much time optimizing the ultrasound image to visualize the fasciae, which are more important than the structure of the nerve itself as we are not doing any diagnostics; instead, we want to find the functional plane relevant for the block.
Local anesthetic injection
As we start the injection, we can see how the local anesthetic pushes the nerve away and fills the fascial plane between the superficial and deep fascia of the flexors of the wrist. We can see how far the local anesthetic reaches away from the injection, meaning that we are injecting into the plane where the nerve resides.
Dr. Hadzic demonstrates how the local anesthetic pushes the median nerve away.
Summary
In summary, we demonstrated four simple ultrasound machine adjustments to get the best possible image for the median nerve block. We did the following:
- We adjusted the overall gain.
- We adjusted the time gain compensation to de-emphasize the structures above and below the nerve.
- We used the dynamic range and reduced it to accentuate the fascial sheaths. The image got more compressed, edgier, and sharper to facilitate fascial sheath recognition.
- We adjusted the focus point to get it into the level of the anatomical structures of interest for the median nerve block.
Summary of the four adjustments to optimize the ultrasound image in 15 seconds.
Watch the full video:
Clinical updates
Sivakumar and Karmakar (Best Practice & Research Clinical Anaesthesiology, 2023) comprehensively review advances in spinal sonography for central neuraxial blocks, demonstrating that preprocedural ultrasound improves accuracy of intervertebral level identification, predicts epidural and intrathecal depth, increases first-pass success, and reduces needle passes, vascular puncture, postdural puncture headache, and back pain compared with landmark techniques. The review emphasizes that these benefits are most consistent when ultrasound is used as a preprocedural adjunct, whereas real-time ultrasound-guided neuraxial blocks, although feasible, remain technically challenging and may reduce efficiency and satisfaction in older patients. Importantly, the authors highlight the L5–S1 interlaminar space as an underused but wider and less degenerated access point that may enhance safety in patients with difficult or abnormal spinal anatomy.